

DV4home
DV4home full version, the first IP (Internet) transceiver for D-Star, DMR, C4FM, P25, NXDN and DPMR
See the bottom of this page for the DV4home video demonstrations / instructions series.
I was one of the first to received the new DV4home, I received it on Thursday the 15 of September 2016, that was before any manual were available (see my unboxing video at the bottom of this page). So I had to figure out the device by myself and from a few answers I’ve got of Uli AG0X at Wireless Holdings (the USA / Canada manufacturer). I won’t complain about this situation since I love the discovery aspect and I’m always eager to test new products, from my point of view this is the fun part of the hobby. Some of my observations below will be found into the product manual as I offer some help compiling a primarily version. This is a very sophisticated box and my first impression was a little bit confusing, but playing with it evolve all the future possibilities of this hardware.
The version I reviewed was the full version (integrated 2 x AMBE chips) and here how I describe the unit “The first IP (Internet) transceiver with dual actives reflectors VFO’s”. At the time of this review there were only 2 modes available, D-Star (DCS and REF reflectors) and DMR (DMR+). As mention you have the equivalent of two VFO’s you can monitor two different modes on two different reflectors that are active simultaneously.
The DV4home also support directly into the box a DV4mini that you can control independently via the conventional software in network remote mode. This configuration enables you to add a RF hotspot that is stand alone, you need the remote software to switch between reflectors but when it’s setup you can close the software and even turn off your PC. This configuration is very practical if you plan to monitor or link (repeater) permanently to specific reflector. The DV4mini will stay connected to the last selected reflector, even if you reboot the device. No needs to have a Raspberry Pi or a dedicated PC anymore when you have the DV4home.
In a future software revision, we will be able to plug into the USB port (rear panel) a WiFi dongle or a 3G/4G/LTE stick. The stand alone unit could be your next mobile (IP) allowing you to reach any reflectors / repeaters networks from any cellular Internet connection. With the temperature tolerance of this product, you can use it in Canada extreme winter weather as long as the Florida extreme summer.
I just can’t wait for the next software update, please fallow my Twitter, Facebook and YouTube threads as I will share a lot of information in the next few days / weeks.
73
Pascal VA2PV
Description
The DV4home uses the same microcontroller platforms as the DV4home compact, but adds 2 AMBE3000 chips, a microphone and a speaker connector to the unit. There is a built-in speaker and the microphone is included.
These components allow these additional functions:
Direct Internet transceiver mode without a DV4mini by using the microphone and the external speaker. This is an economical alternative if no local wireless signal is needed. In this mode the DV4home supports D-Star, DMR, dPMR, NXDN (and later *C4FM via software update)
Dual mode support: even without a DV4mini inserted the unit can be simultaneously connected to a D-Star and a DMR reflector, using 2 separate speakers to play the respective audio streams.
Transceiver mode connects a D-Star or DMR radio via a plugged in DV4mini to a reflector.
Conference mode requires a DV4mini inserted into the unit and allows to use the built-in microphone/speaker connectors and the RF connection through the DV4mini to a DMR or D-Star radio. This mode works in D-Star and DMR.
Transcode (later via software update) mode allows to use a digital radio in one mode and connect to a reflector in another mode. Use your D-Star radio to try out DMR! The following conversions are supported:
D-Star → DMR
DMR→ D-Star
All –>. Fusion (C4FM)
Fusion (C4FM) → All
DMR/D-Star Bridge mode allows to interconnect DMR and D-Star reflector rooms using the licensed DVSI AMBE chips. This mode bears the risk of creating loops in the network, therefore a free license key is required which also helps that the installations can be supported by the network administrators to assure a flawless integration.
IPSC2 and DMRplus bridge permits the connection between DMRPlus.
DV4home technical Data
| Power | 9-15V, 1A, barrel connector 5.5/2.5mm |
| Ethernet | RJ-45, 10/100 MBit/s |
| Speaker | Stereo 3.5mm for simultaneous dual mode operation |
| Microphone | DTMF, Electret with modular connector |
| DV4mini slot | Integrated shielded compartment with USB connector |
| USB interface | WLAN or LTE stick for wireless Internet connectivity |
| Line out | 3.5 mm 1 Vss |
| Display | 256 x 64, 4 lines OLED |
| Temperature range | -40C – + 85C |
| Ethernet | RJ-45, 10/100 MBit/s |
DV4home front panel
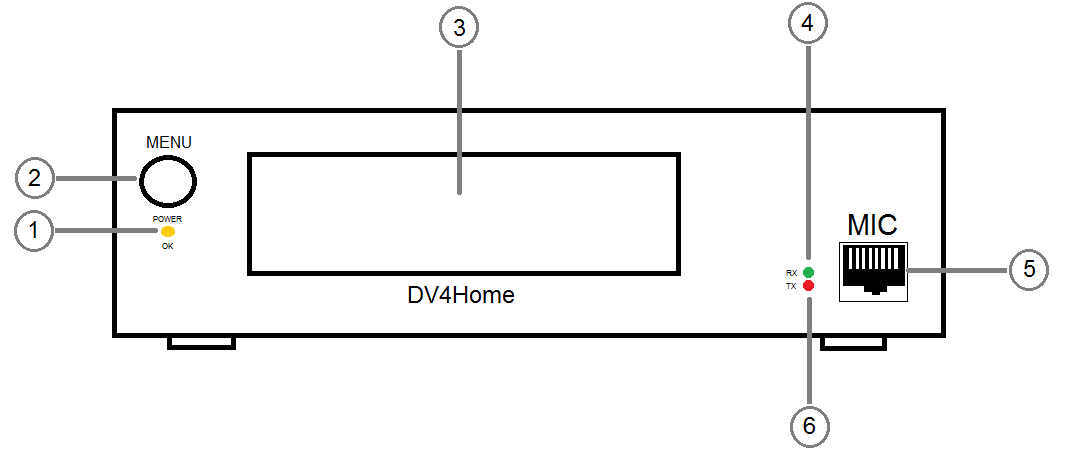
- Power led indicator
- Volume and multifunction knob
- Turn clock wise to increase volume, turn counter clock wise to decrease volume
- Press momentary the knob to switch between menu
- Press and hold 2 seconds to enter a command or wait for ok to appears in the bottom left corner of the screen
- OLED display
- Green led on when receiving signal (does not show the status of the optional DV4mini)
- Microphone connector – 8 pins female RJ-45, the MIC connector does not us any conventional pinout because of it’s internal configuration. The pinout connections will be published in the next manual version.
- Red led on when transmitting (PTT), (does not show the status of the optional DV4mini)
DV4home rear panel
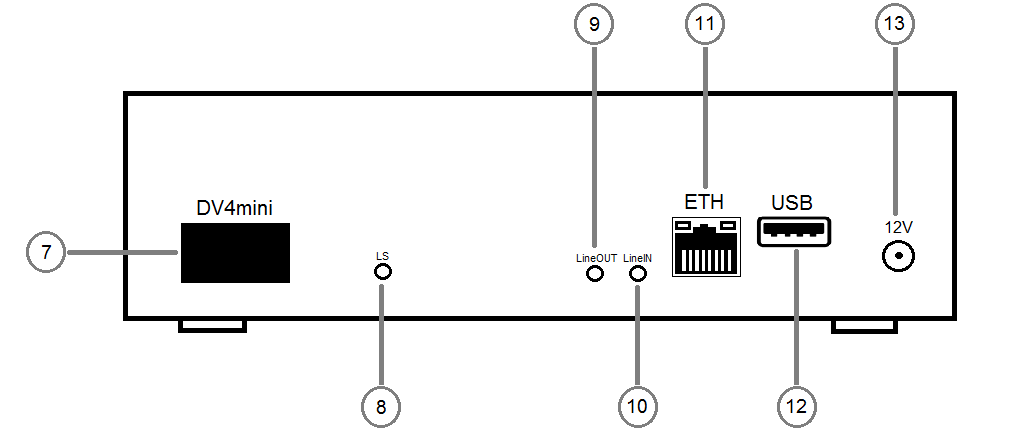
- DV4mini slot (DV4mini optional)
- LS for Loud Speaker, providing variable volume for an external speaker
- LineOUT, line level audio output 1/8 inch diameter (3.5mm) female jack
- LineIN, Line level input (available in future software update) 1/8 inch diameter (3.5mm) female jack
- Ethernet 8 pins RJ-45 connector for Internet connection, 10/100 Mbps
- USB port (type A) for Wifi dongle or LTE stick (available in future software update)
- Power connector, 9-15V, 1A, barrel connector 5.5/2.5mm

Initial Setup
Before turning on the DV4home for the first time make sure you have a wire Ethernet connection to your home router. When you turn on the DV4home for the first time it will show on the display it’s IP address (obtain by your home router via DHCP) with an http link necessary to setup your callsign and your DMR ID (CCS7 ID). The IP address scheme will vary from one place to another depending of the local network configurations (LAN) or the router manufacturer default subnet.
Here’s an example for the 192.168.10.0 /24 network:
Here’s an example : http://192.168.10.121/user/ ATTENTION: Do not use user.html.
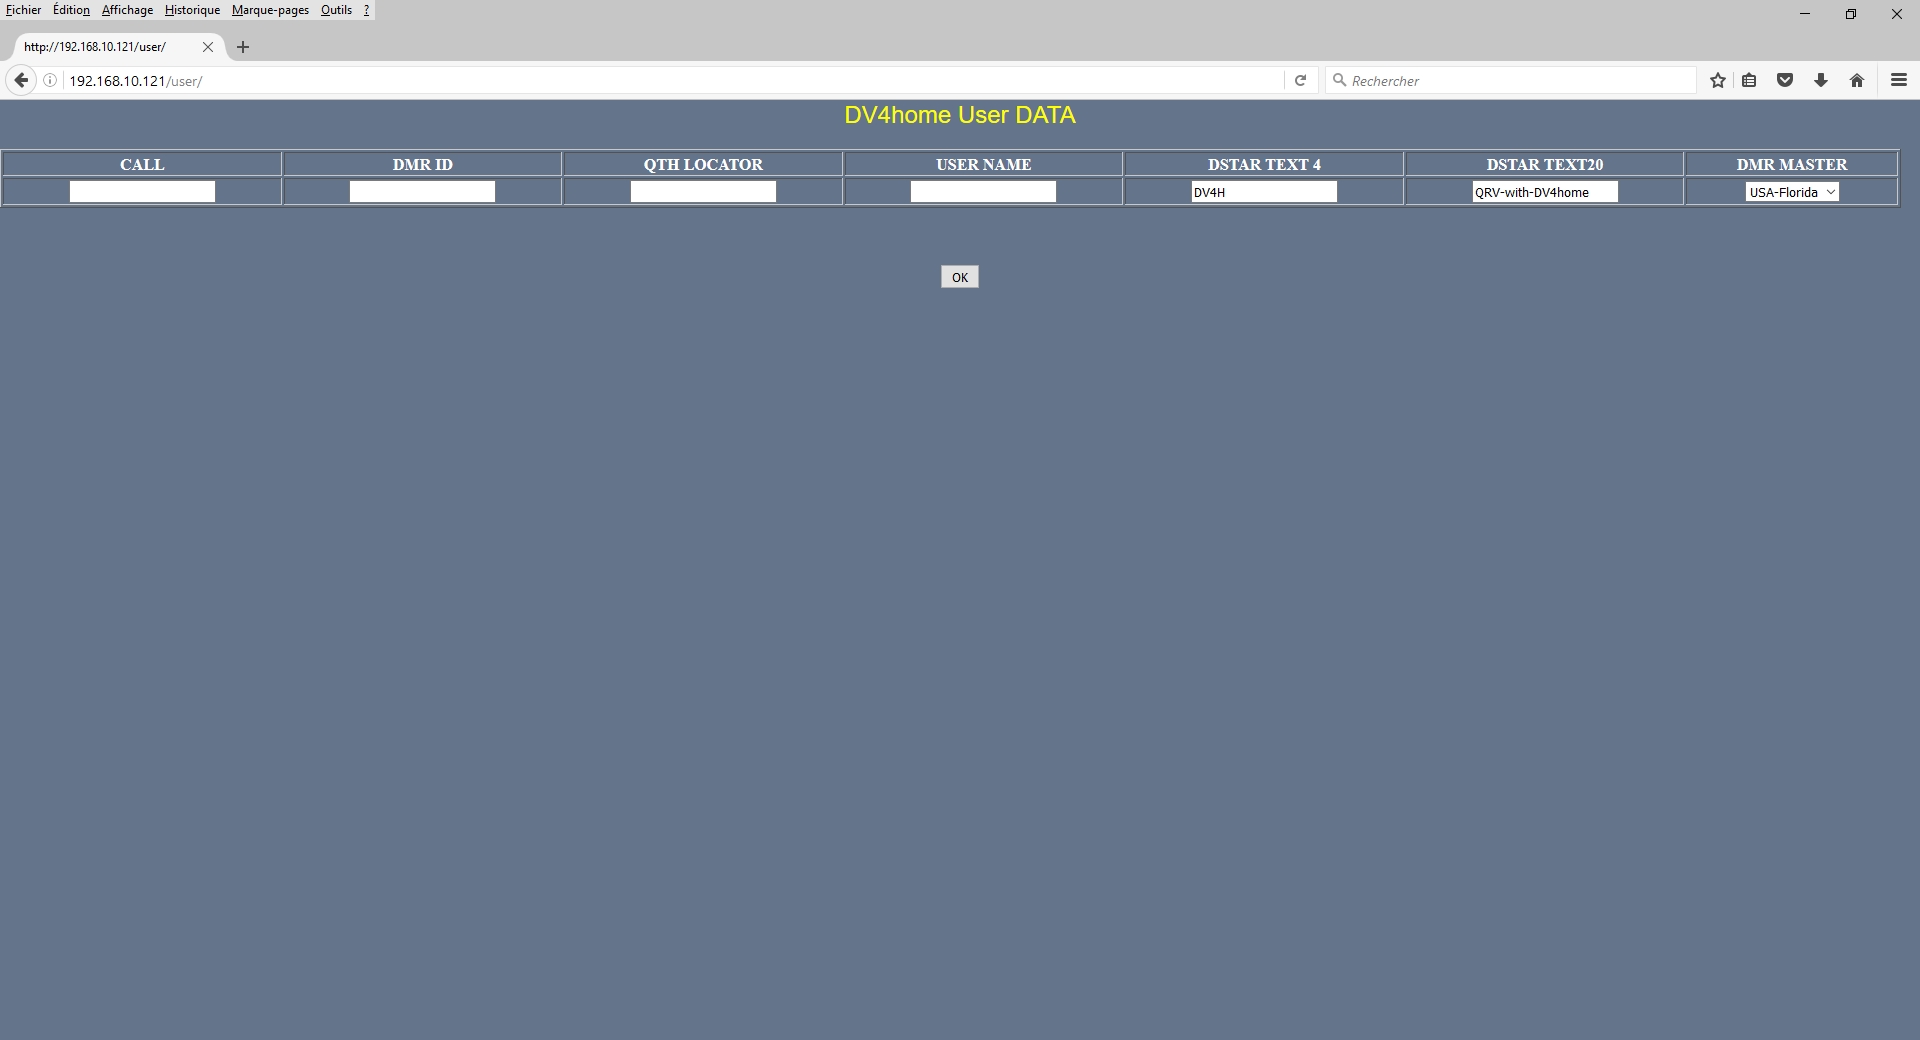
Now enter on any web browser within your home network and type the link showed on your DV4home screen. You should then access the DV4home user setup, see image above. Enter your DMR ID (CCS7 ID) and your callsign, click ok and your done. You can change the user settings anytime by accessing the same URL.
Make sure you have entered your CCS7 ID (DMR ID). The DV4home will not work without it.
In order to use the DV4home you must obtain a unique ID which is coordinate worldwide as a digital ID. For all digital plateform.
Step 1
Get an ID from DMR-MARC team;
http://dmr-marc.net/cgi-bin/trbo-database/register.cgi
Step 2
Register your call sign, when you obtained your DMR-MARC number. The site below confirms your registration.
http://register.ham-digital.net/
You cannot just enter your call sign in the DV4home interface, you must enter the DMR unique ID, this will give you access to all the reflectors and all modes. You need also to make sure you are register to the D-STAR trust server in order to use this mode.
Operating the DV4home
The DV4home is a stand alone device and there’s two different ways it can be configure. The first one is via the DV4home menu button on the front panel and the second one is via a web browser interface since it as a integrated web server.
Remote webserver
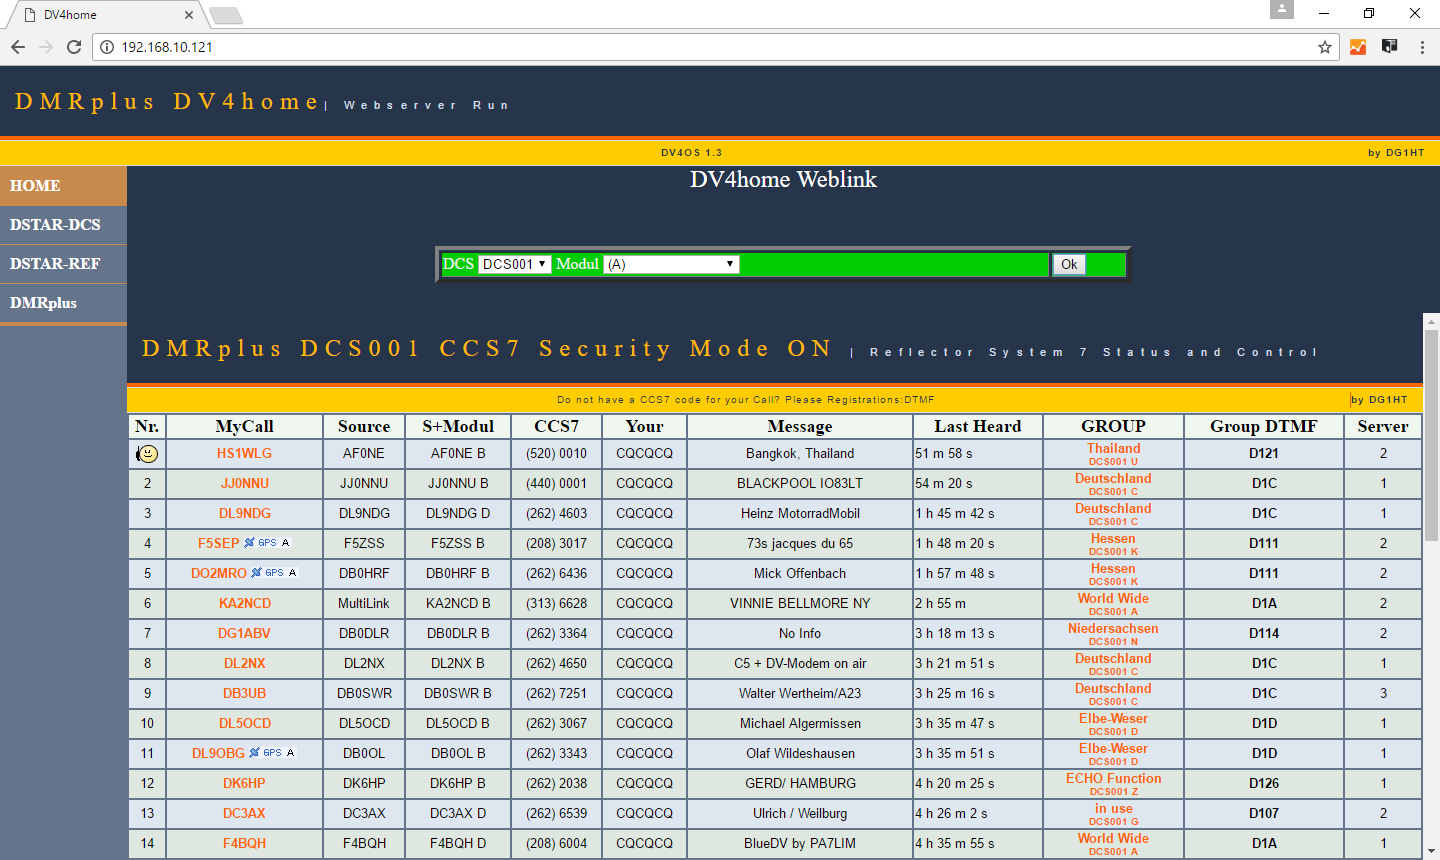
When you enter the IP address of your DV4home into a web browser, you will access the DV4home webserver.
DV4home home page example: http://192.168.10.121
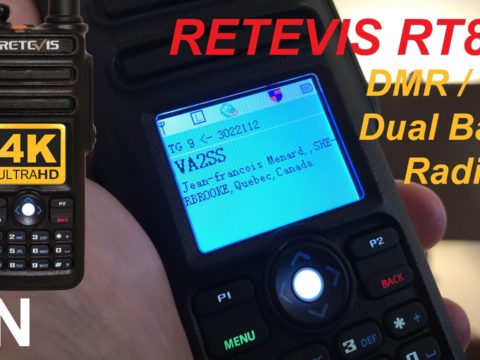
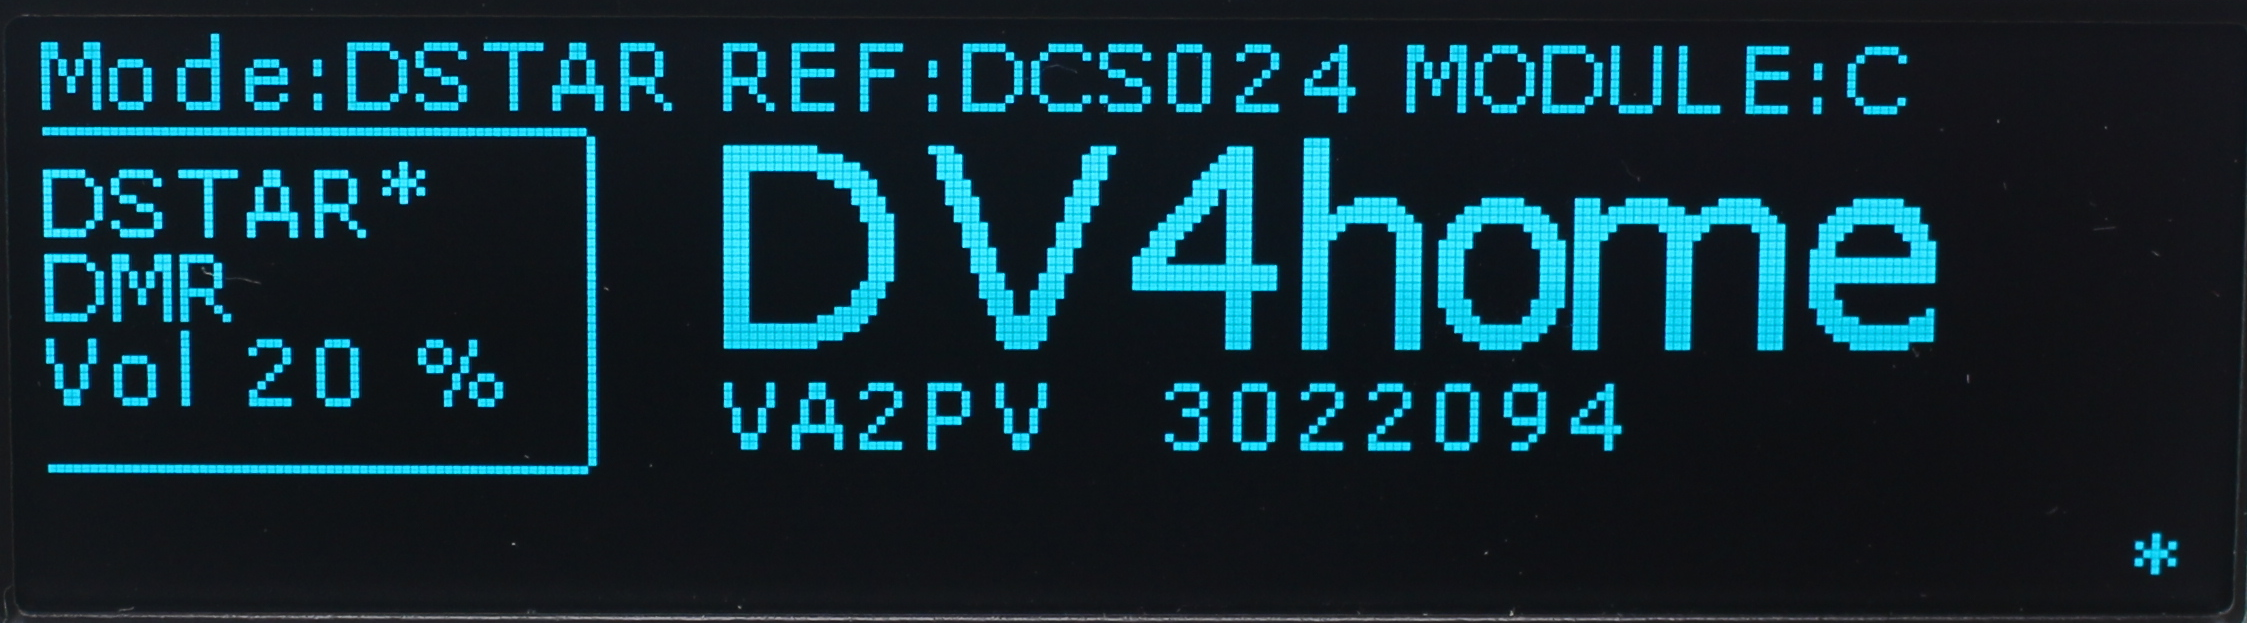
On the DV4home home page you will see the current modes status, if it does not show press F5 on your computer keyboard to refresh. The DV4home as two integrated AMBE chips, so you can have two separate modes operating at the same time. The current software version only support D-Star and DMR, in the image below you see that there’s two modes active and it shows on which reflectors it is connected.
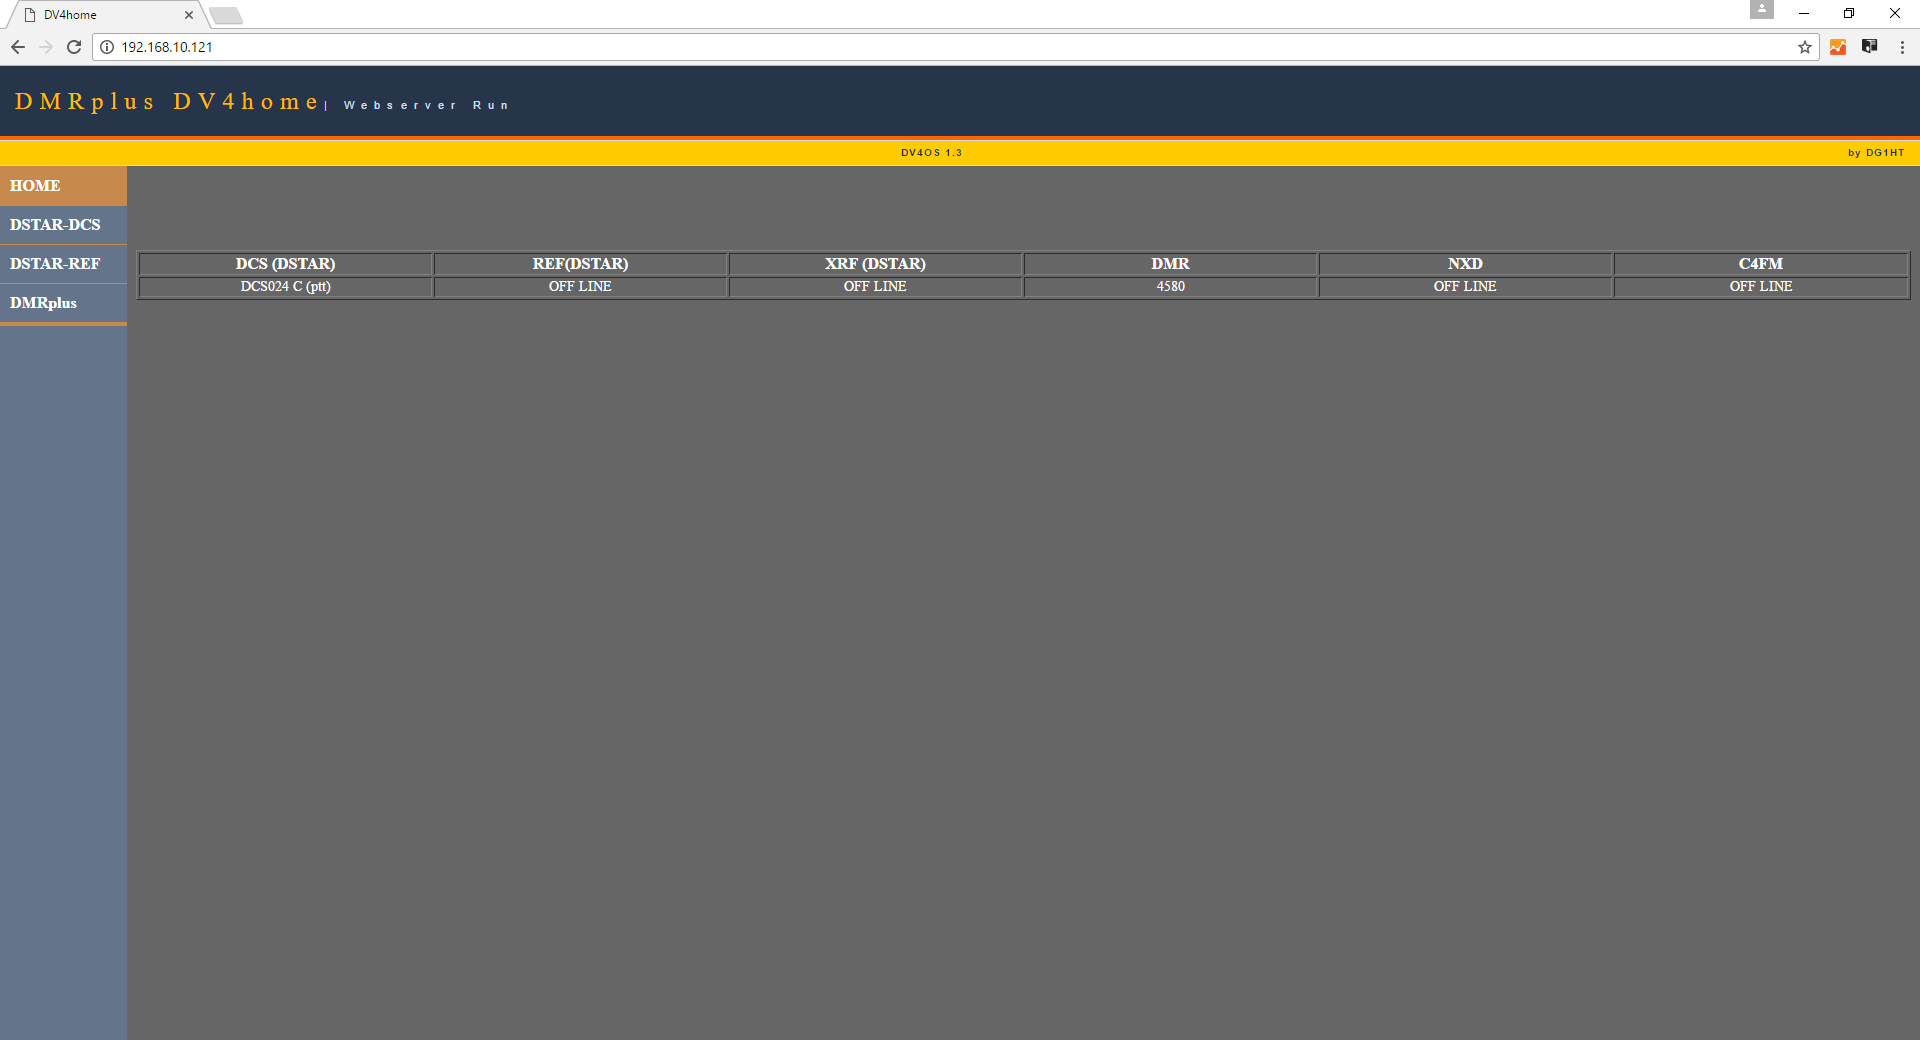
This image is from a preliminary software version, the other modes / reflectors will be available later this year.
Connecting to a reflector
Method #1: Using any web browser
When you access the home page of the DV4home webserver and click on DSTAR-DCS, you will fin a drop down menu that allow you to select a DCS reflector and room.
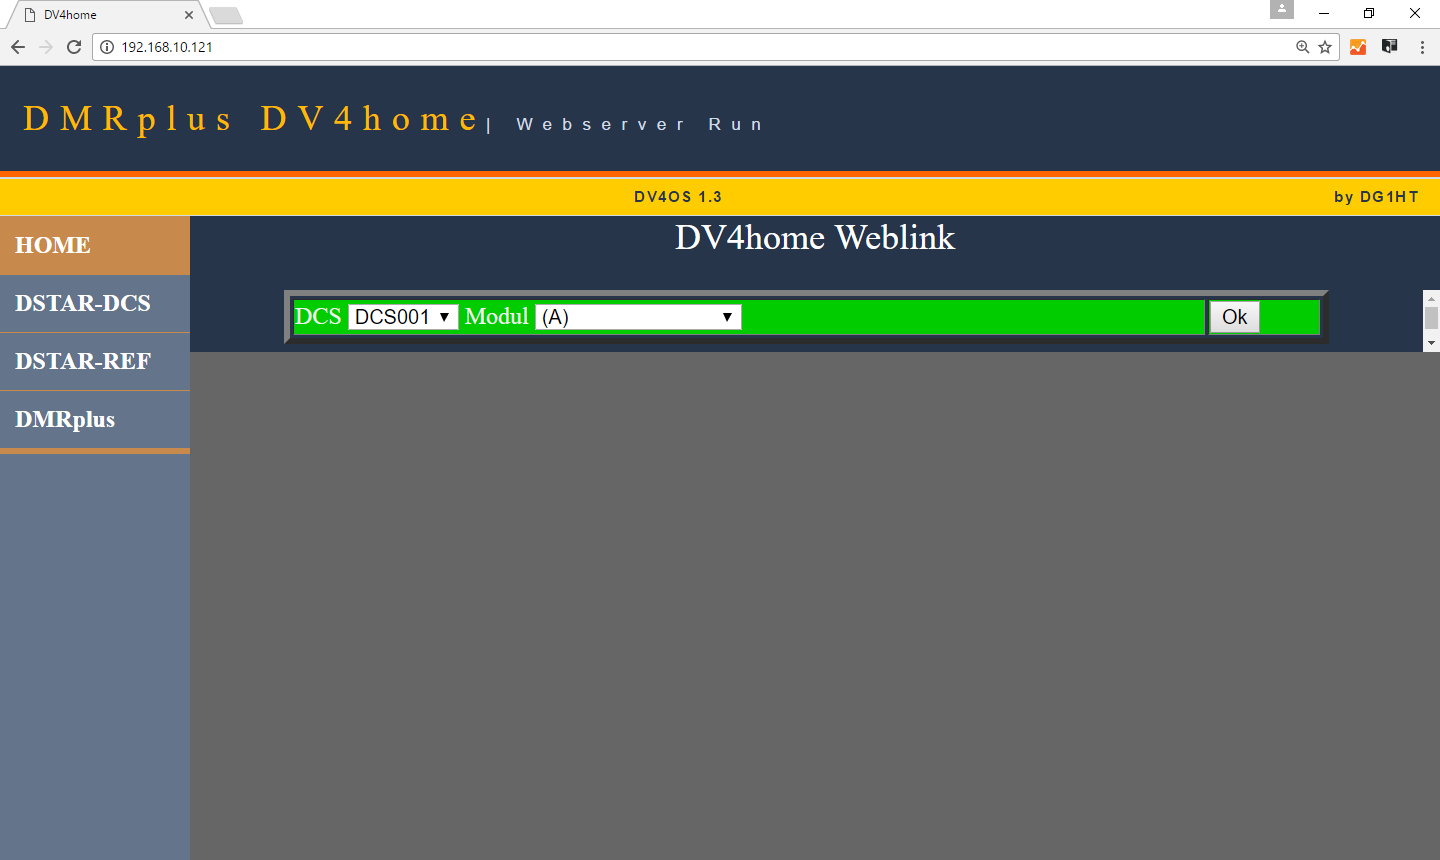
Select a DCS reflector from the drop down menu, a modul (port) and click ok to connect. After connecting you will have the reflector status information’s displayed into the web page. See below.
The procedure is the same for all the other modes.
Method #2: Direct on the DV4home
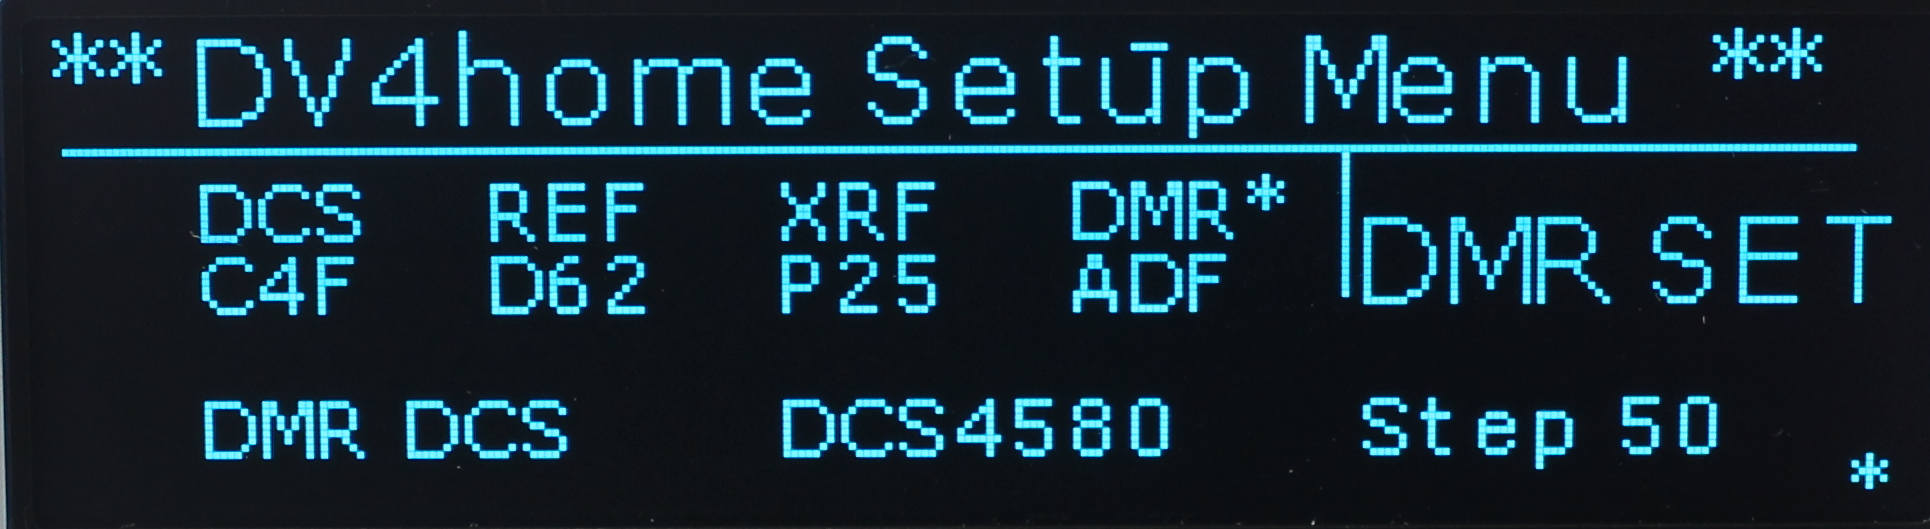
To access the main menu, do a momentary press on the MENU (volume) knob.
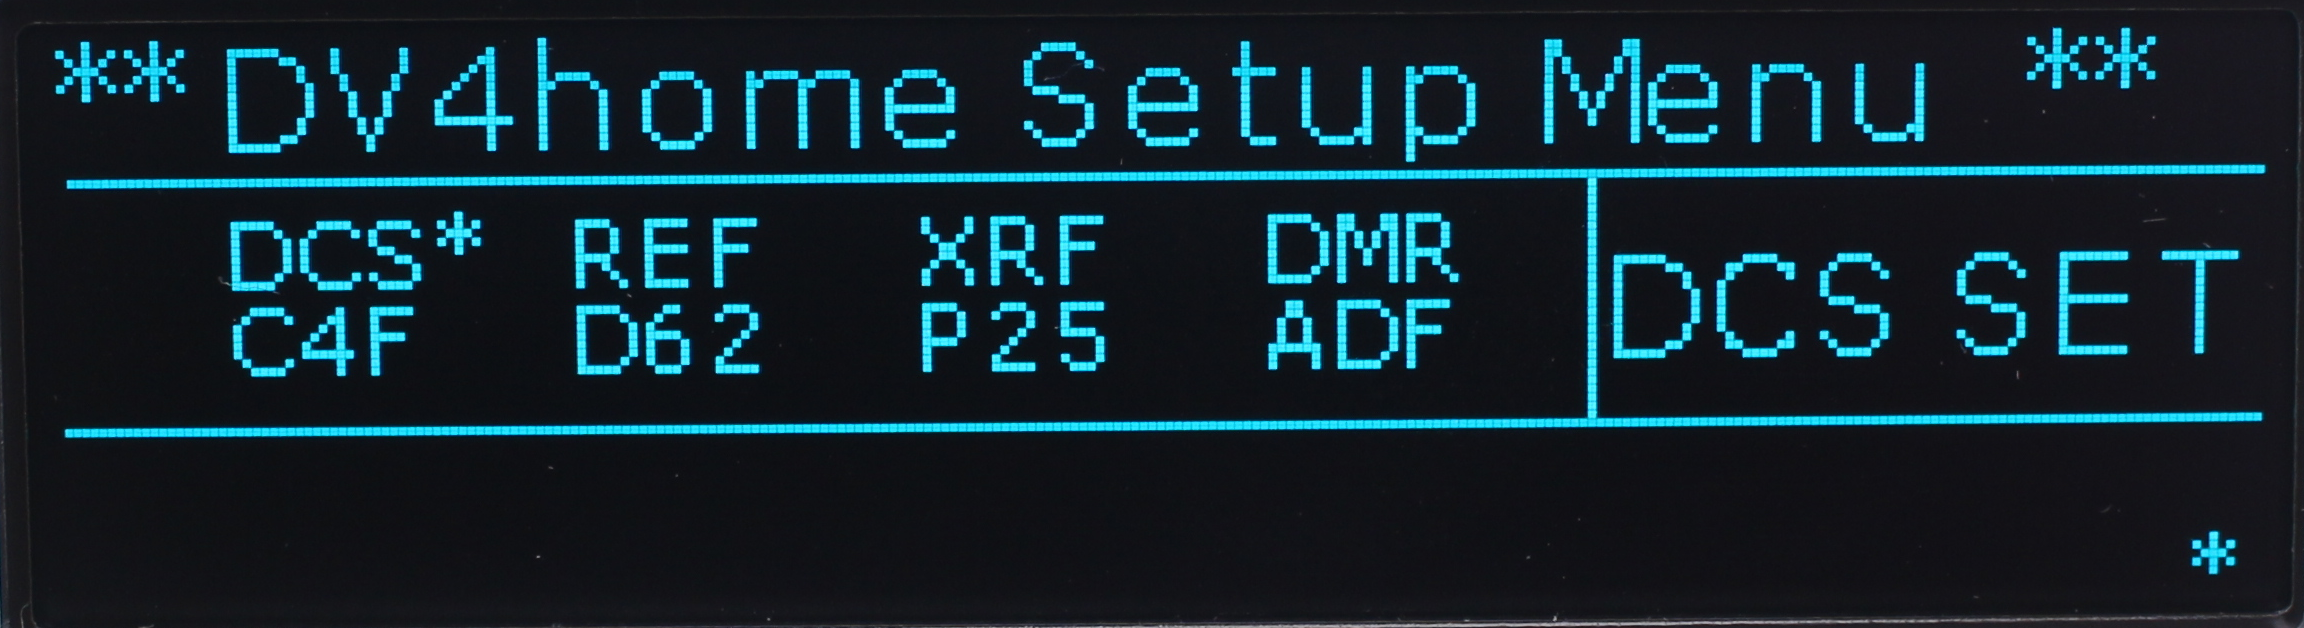
The * indication show the current selected mode, to change to another mode just rotate the MENU knob.
After selecting the operating mode do a momentary press to access the submenu of that mode.

If you rotate the MENU knob you will find 5 options;
1. Reflectors ( D-Star DCS in the example below)
2. Ports (DCS in the example below)
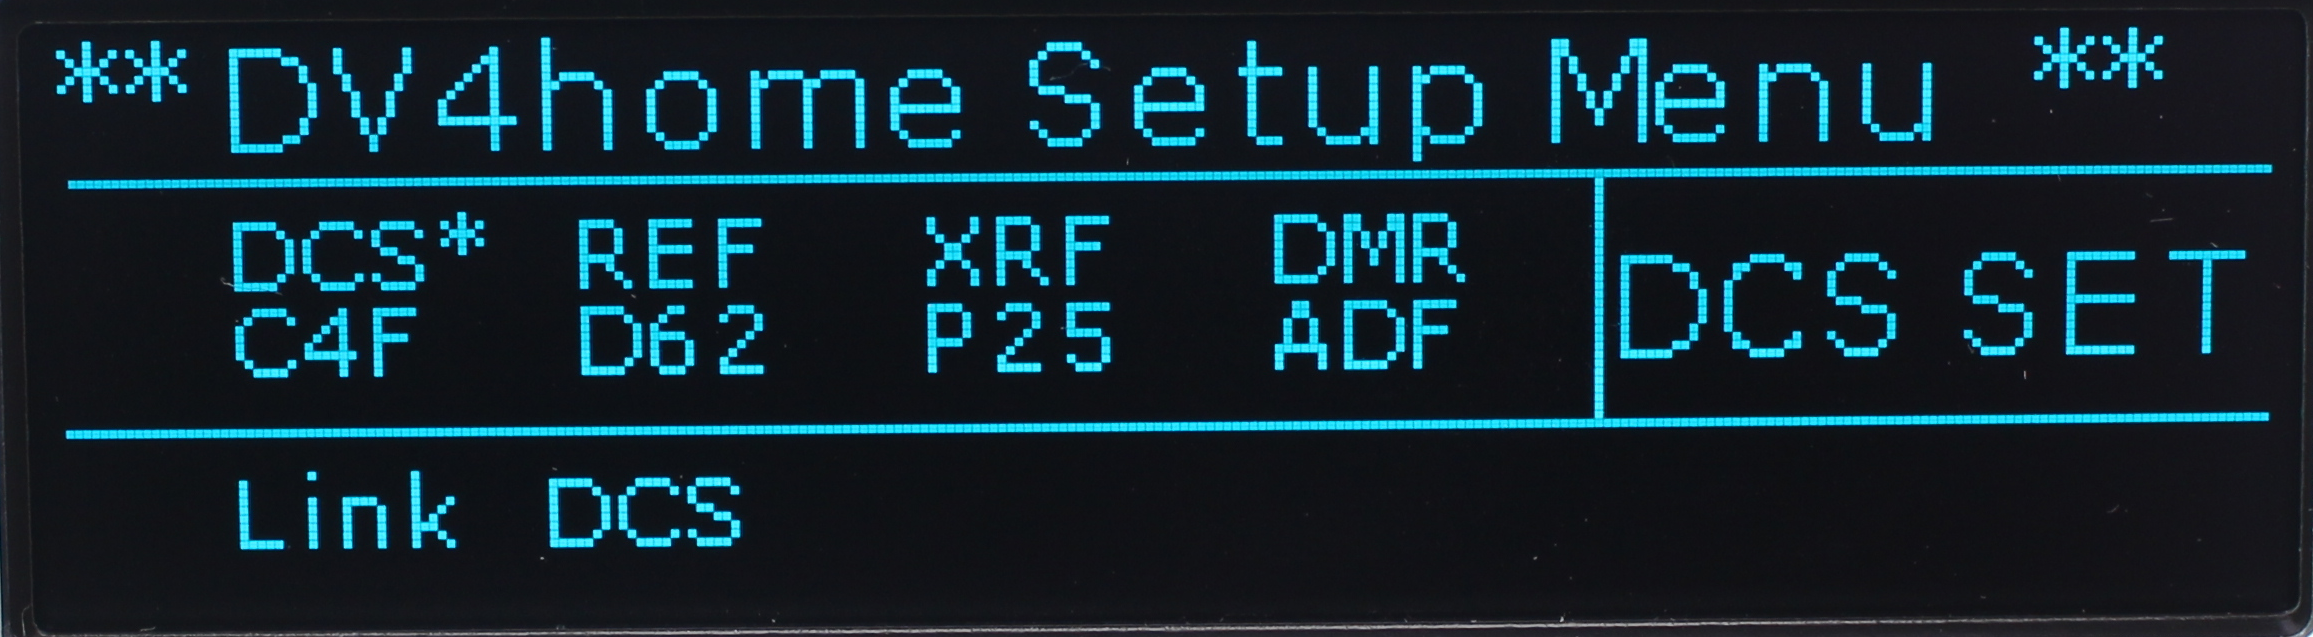
3. Link … (DCS in the example below)
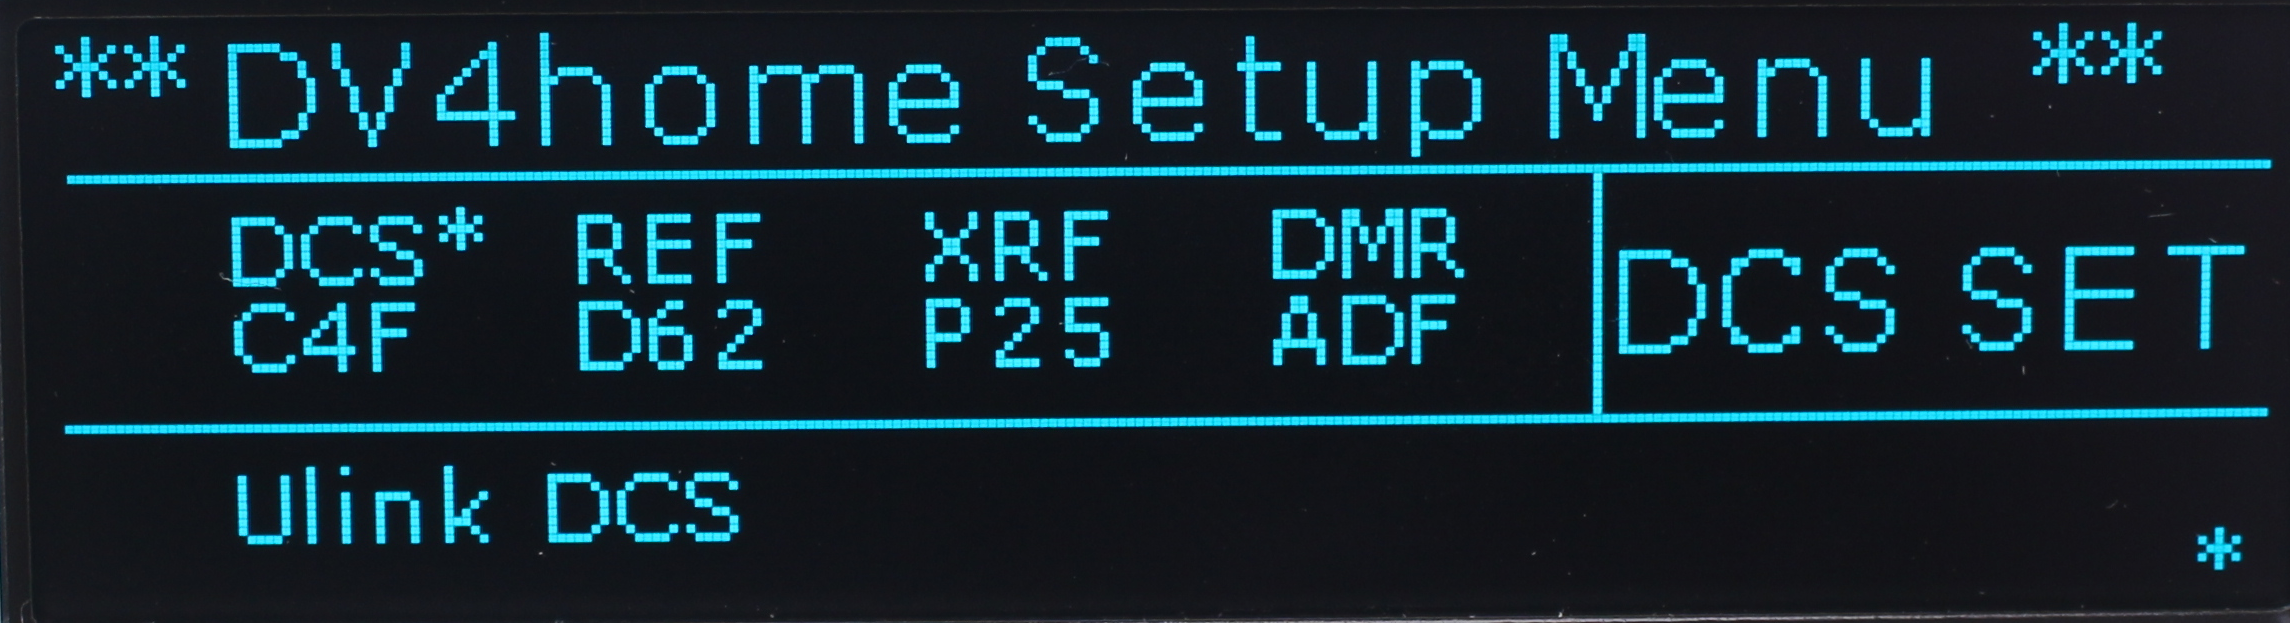
4. Unlink … (DCS in the example below)
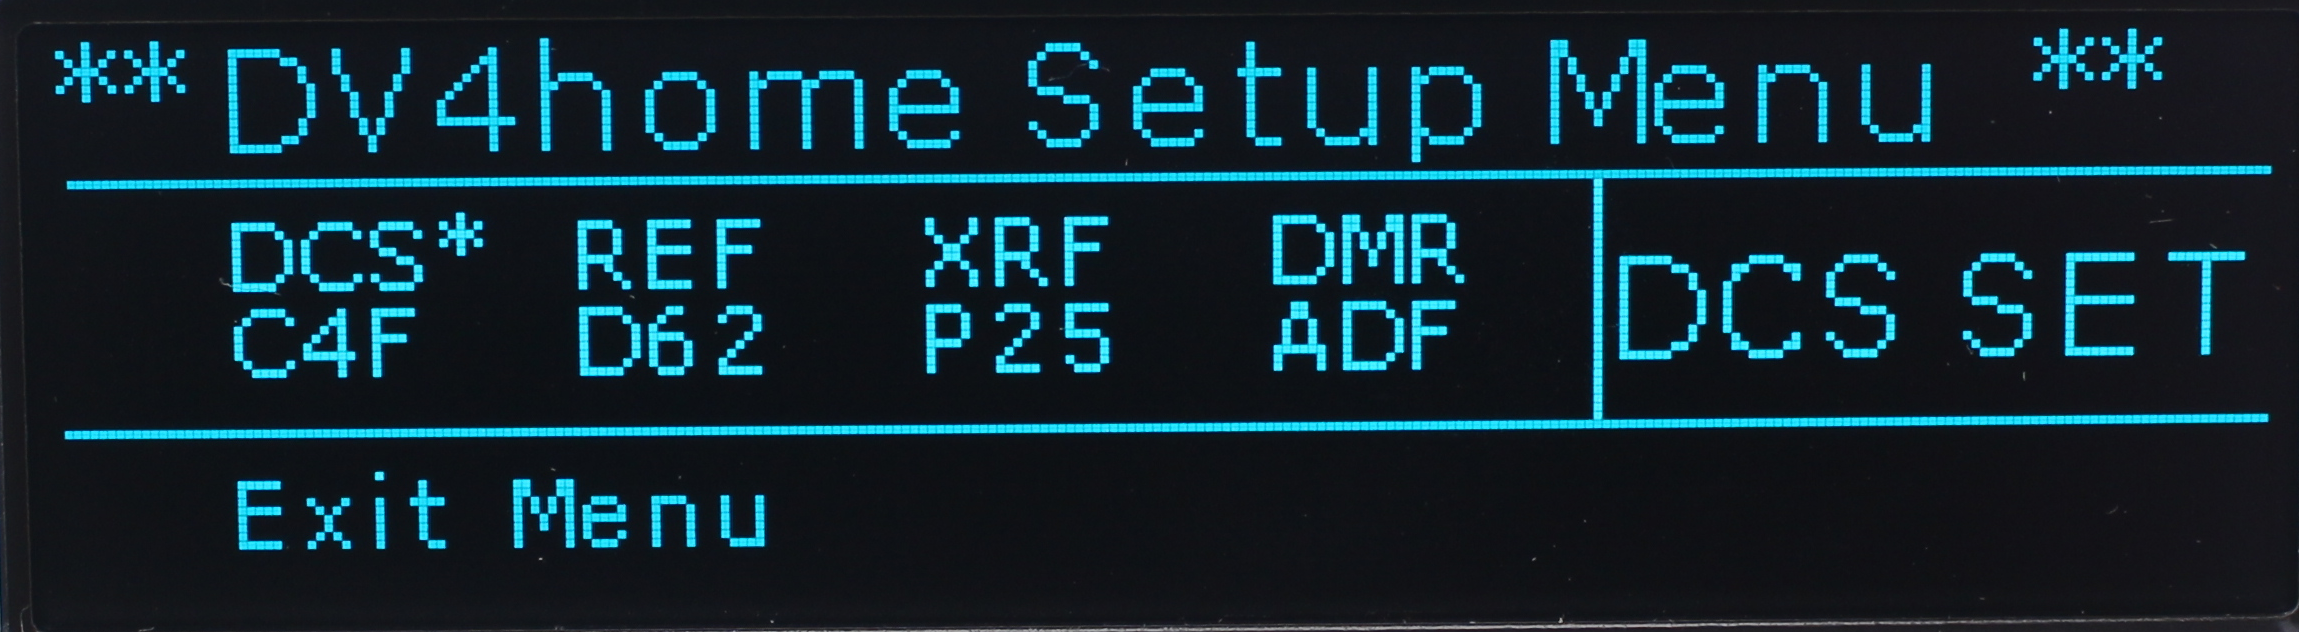
5. Exit Menu
Programming a reflector with method #2
The procedure below is showing how to select a mode, reflector, port and how to activate it. The example is base on the DCS reflector, please note that it is the same procedure for all the other modes. In this example we will program for DCS008 module C. To return to the main screen just press and hold the MENU knob for a few seconds.
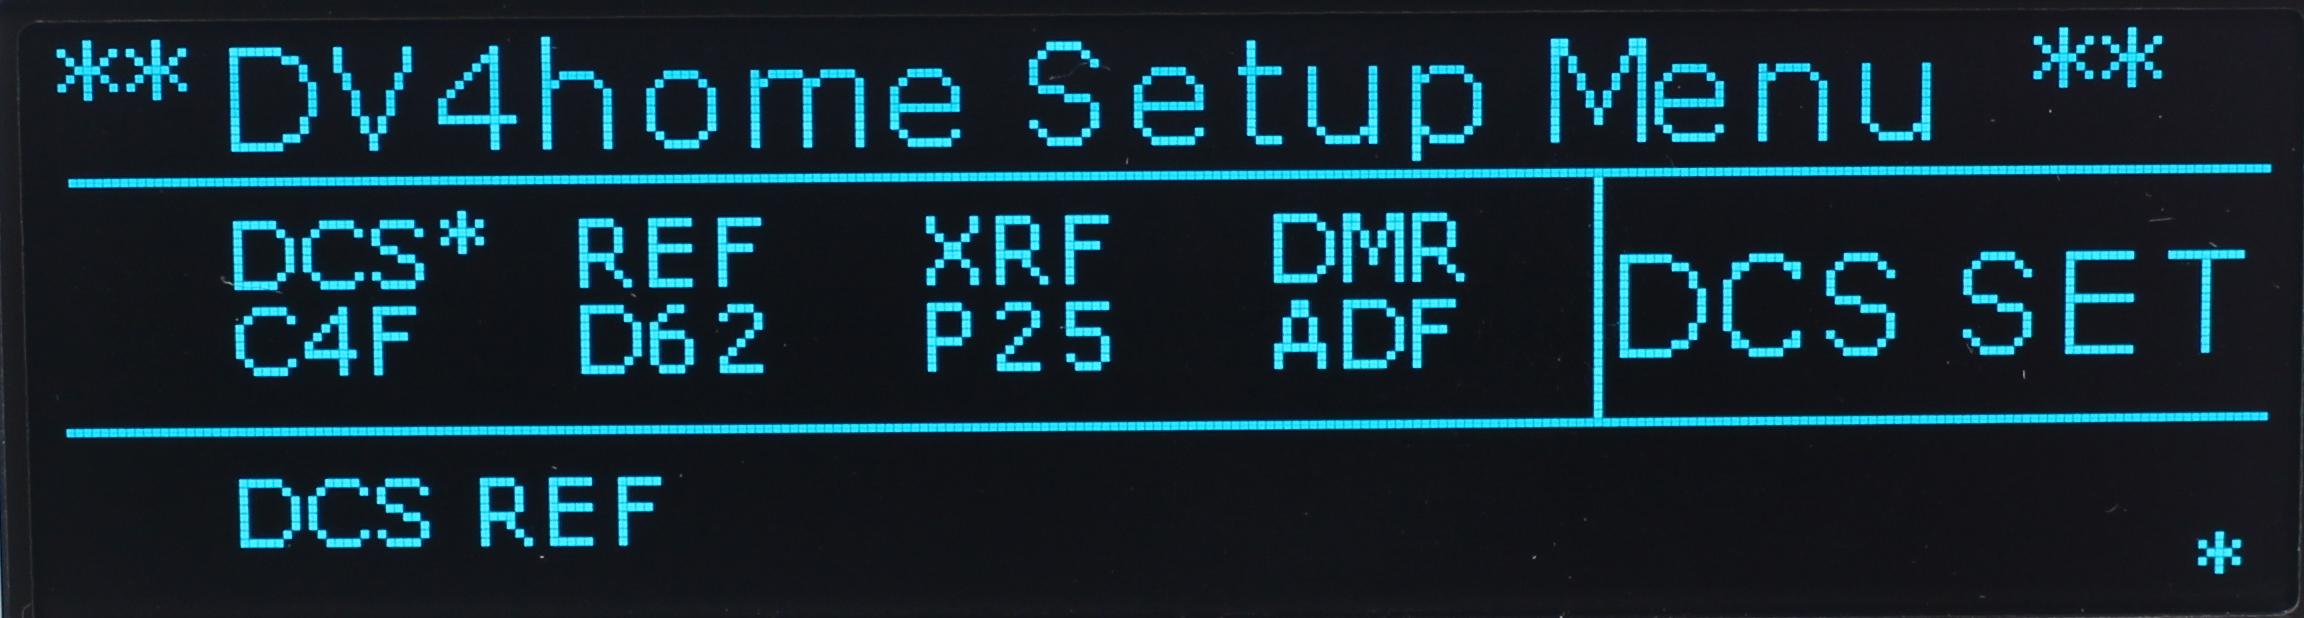
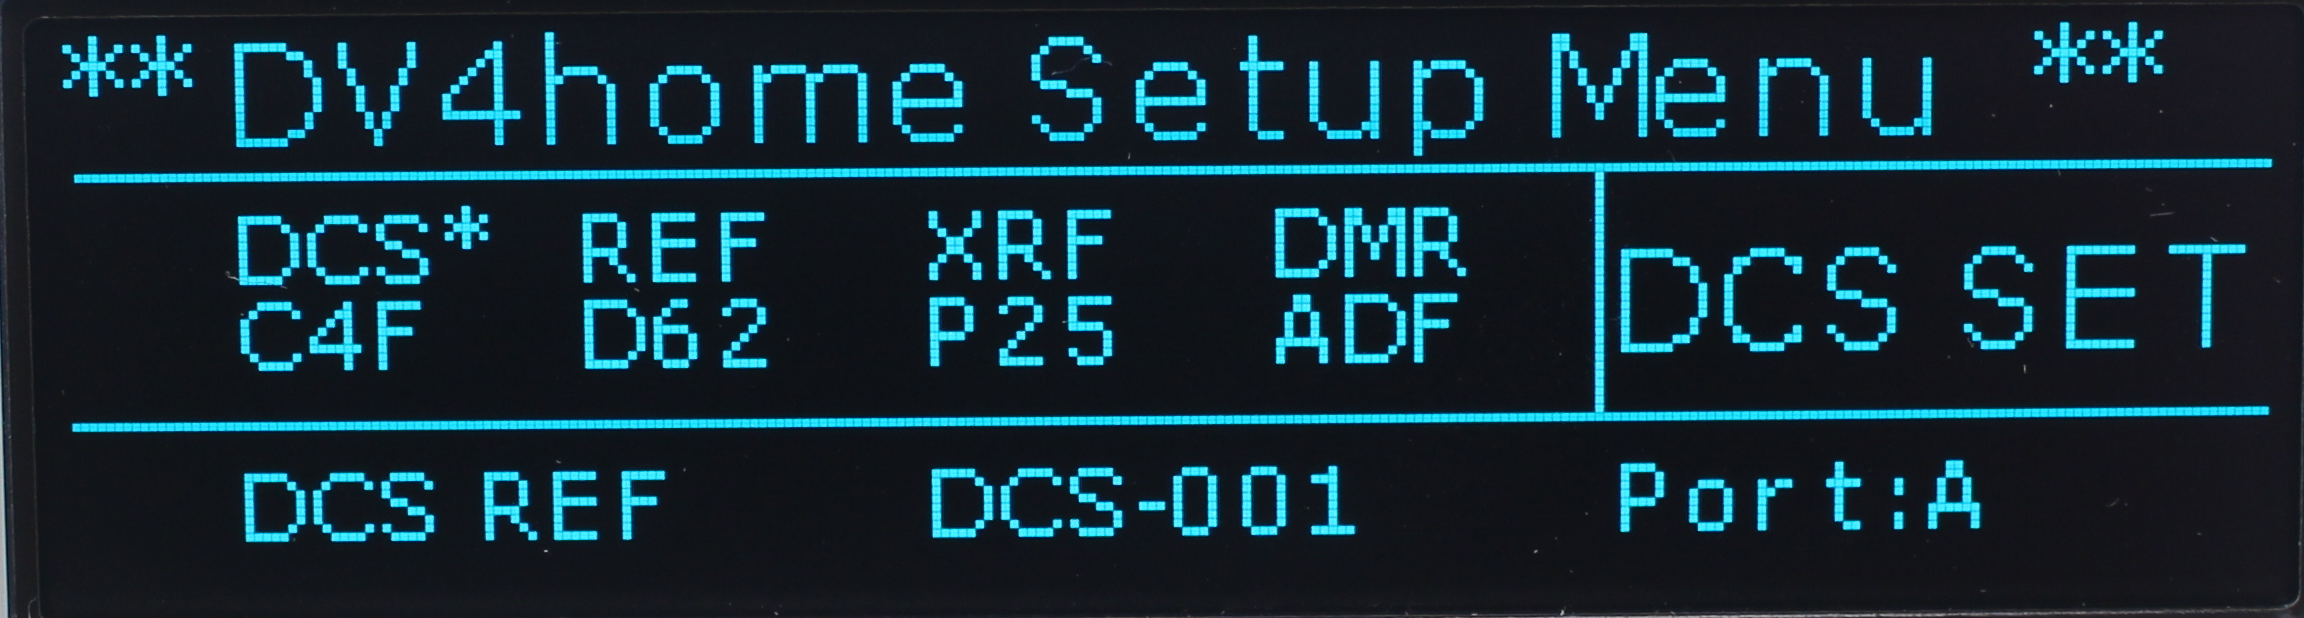
From the main menu select the operating mode by rotating the MENU knob. Press momentary le MENU knob. The image below showed the submenu screen of the DCS selection.
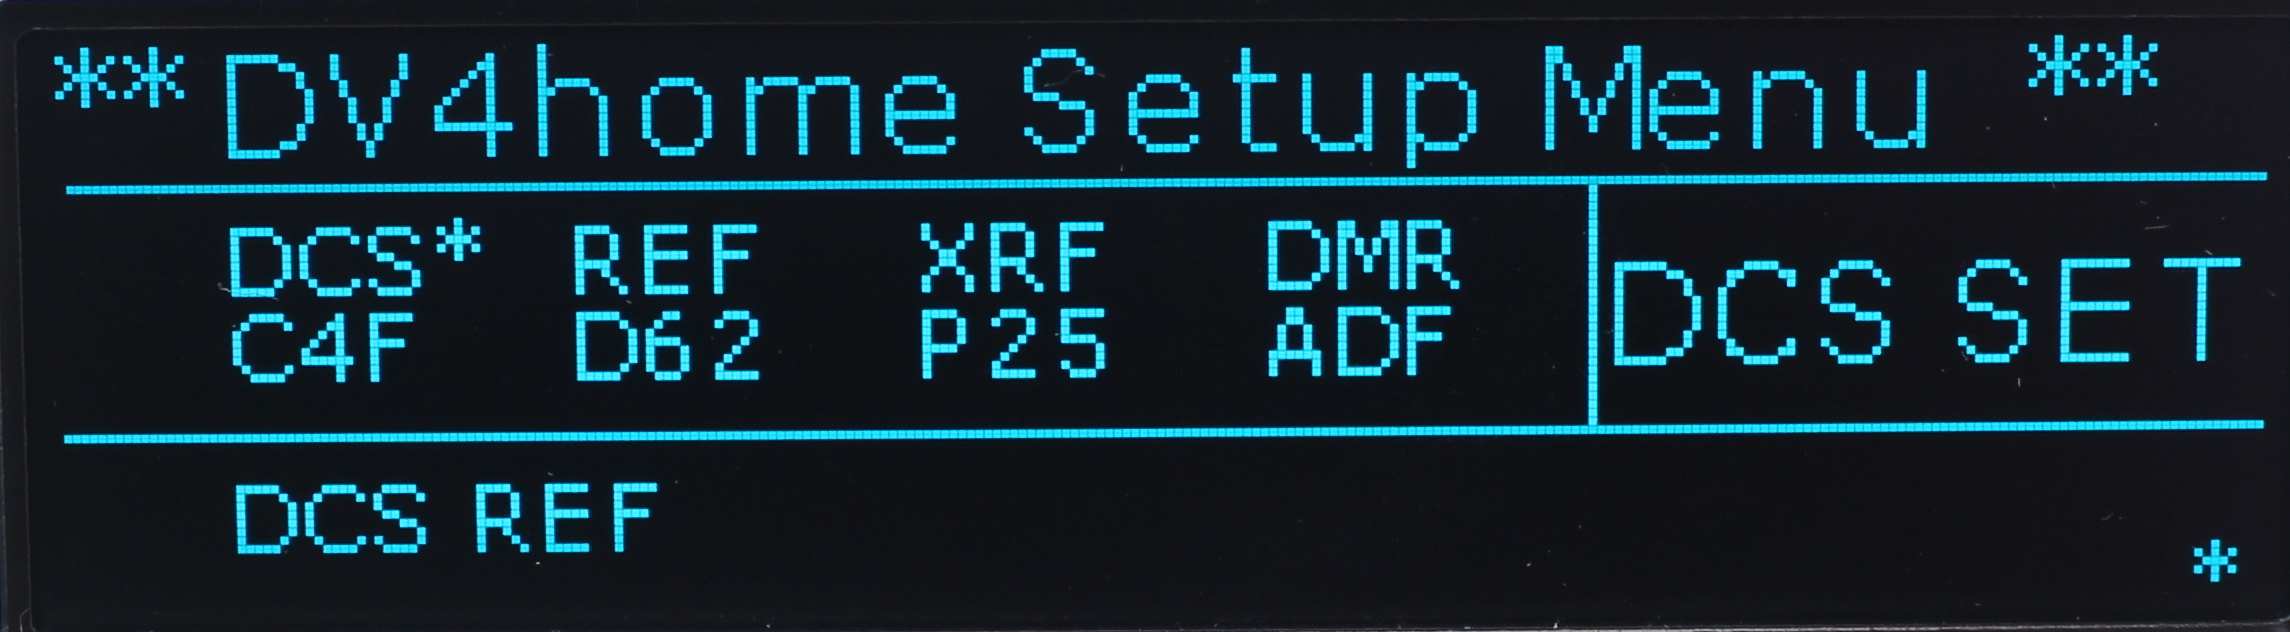
Press momentary the MENU knob to access the DCS REF configuration menu. The current configuration is for DCS-001 Port A.
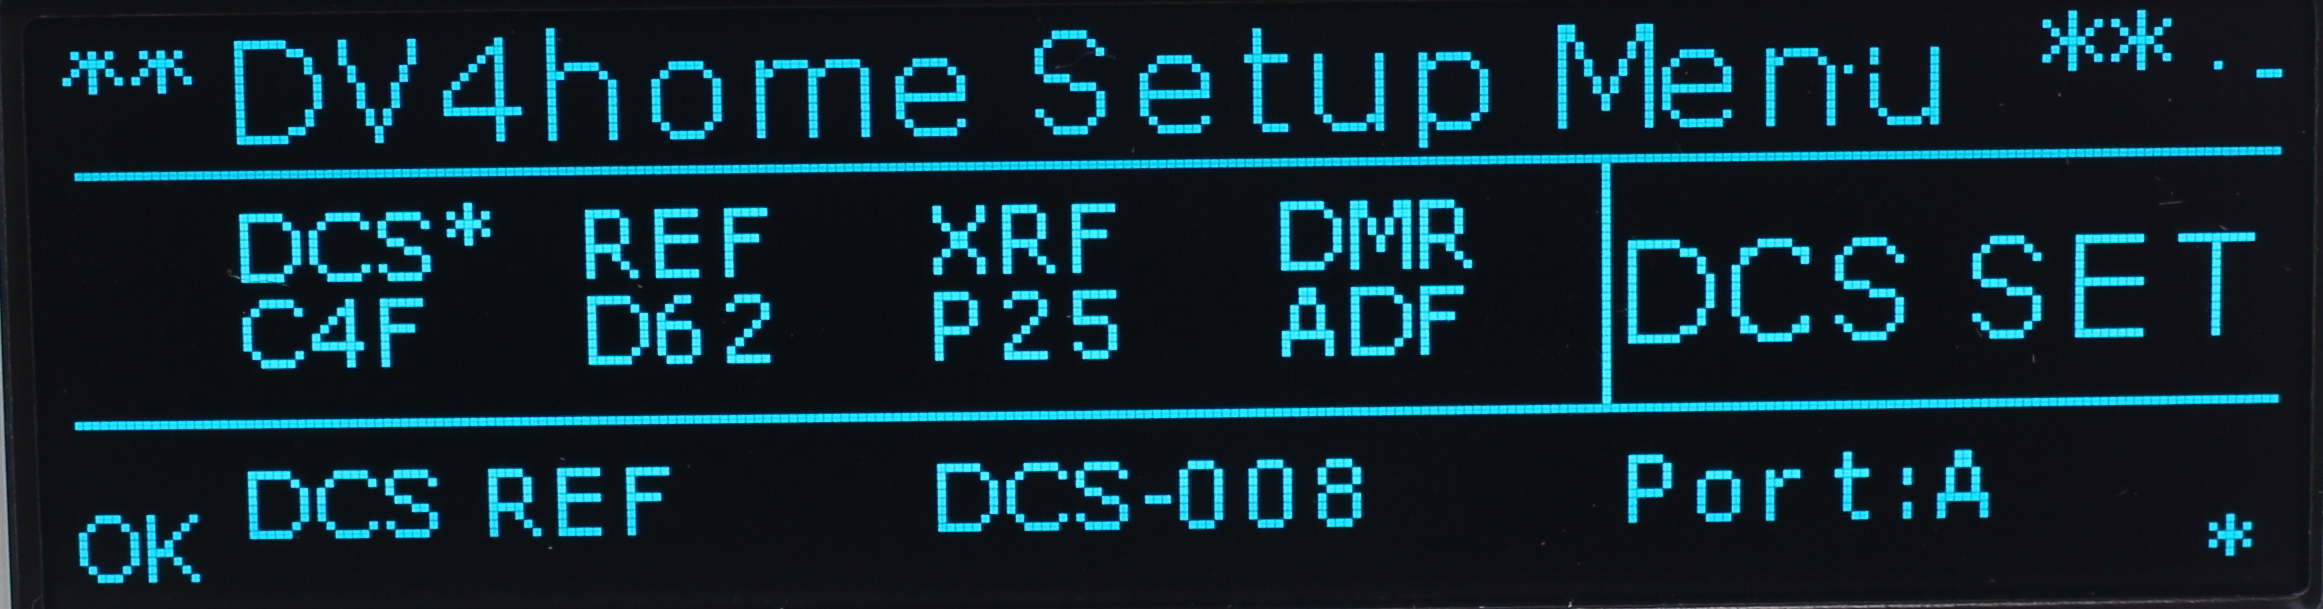
If you rotate de MENU knob the DCS-001 will change, then select the desire DCS and press and hold the MENU knob to complete the selection. In the example below we selected DCS-008.
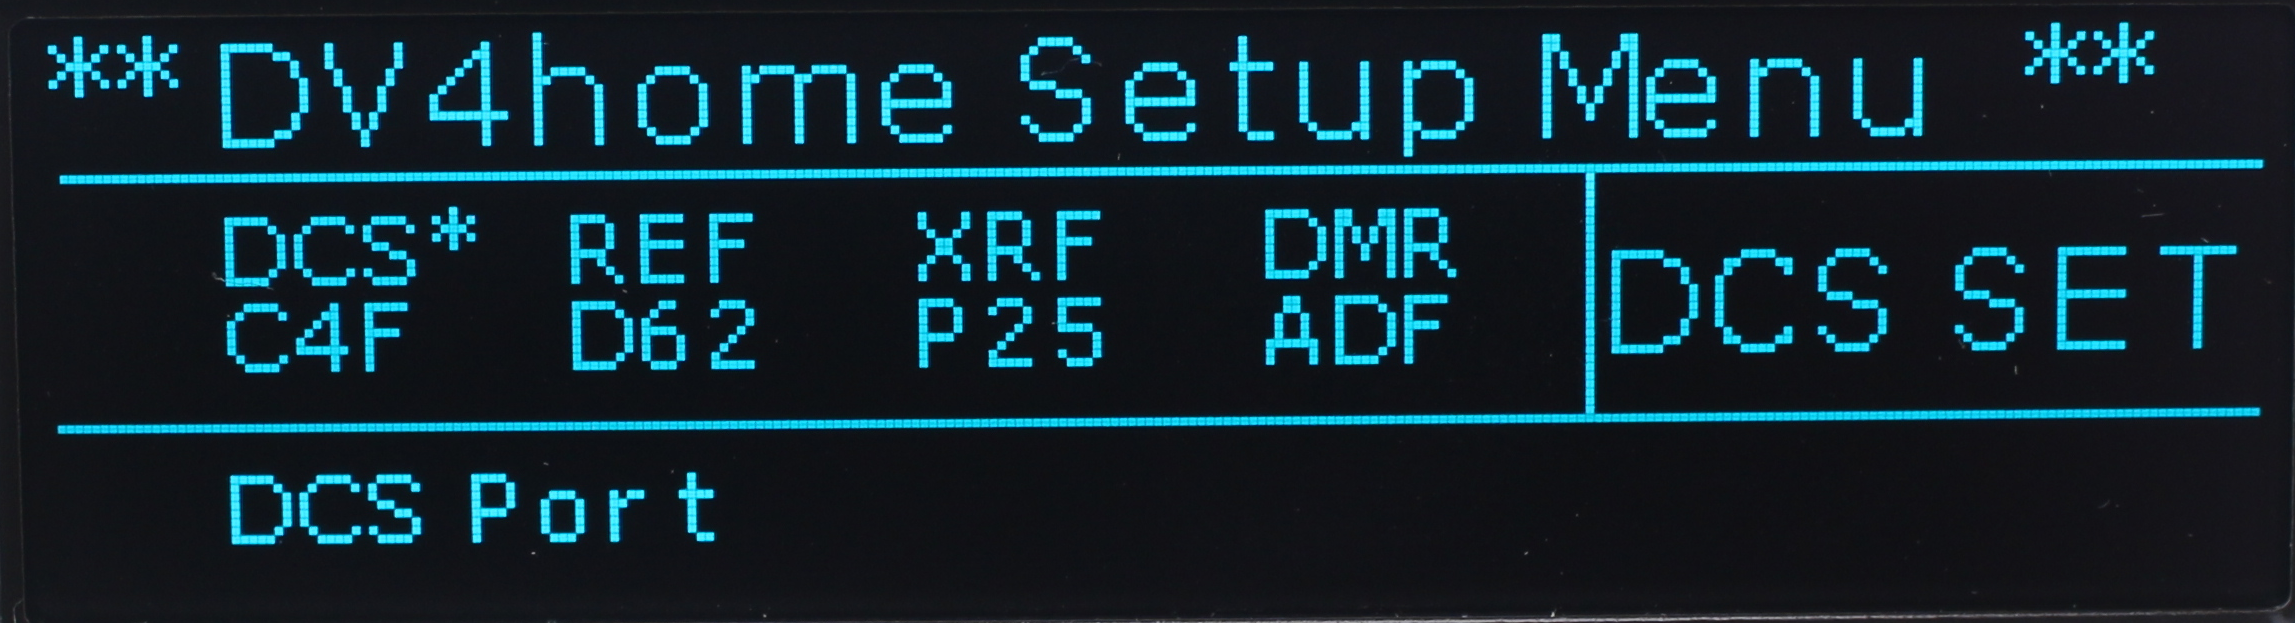
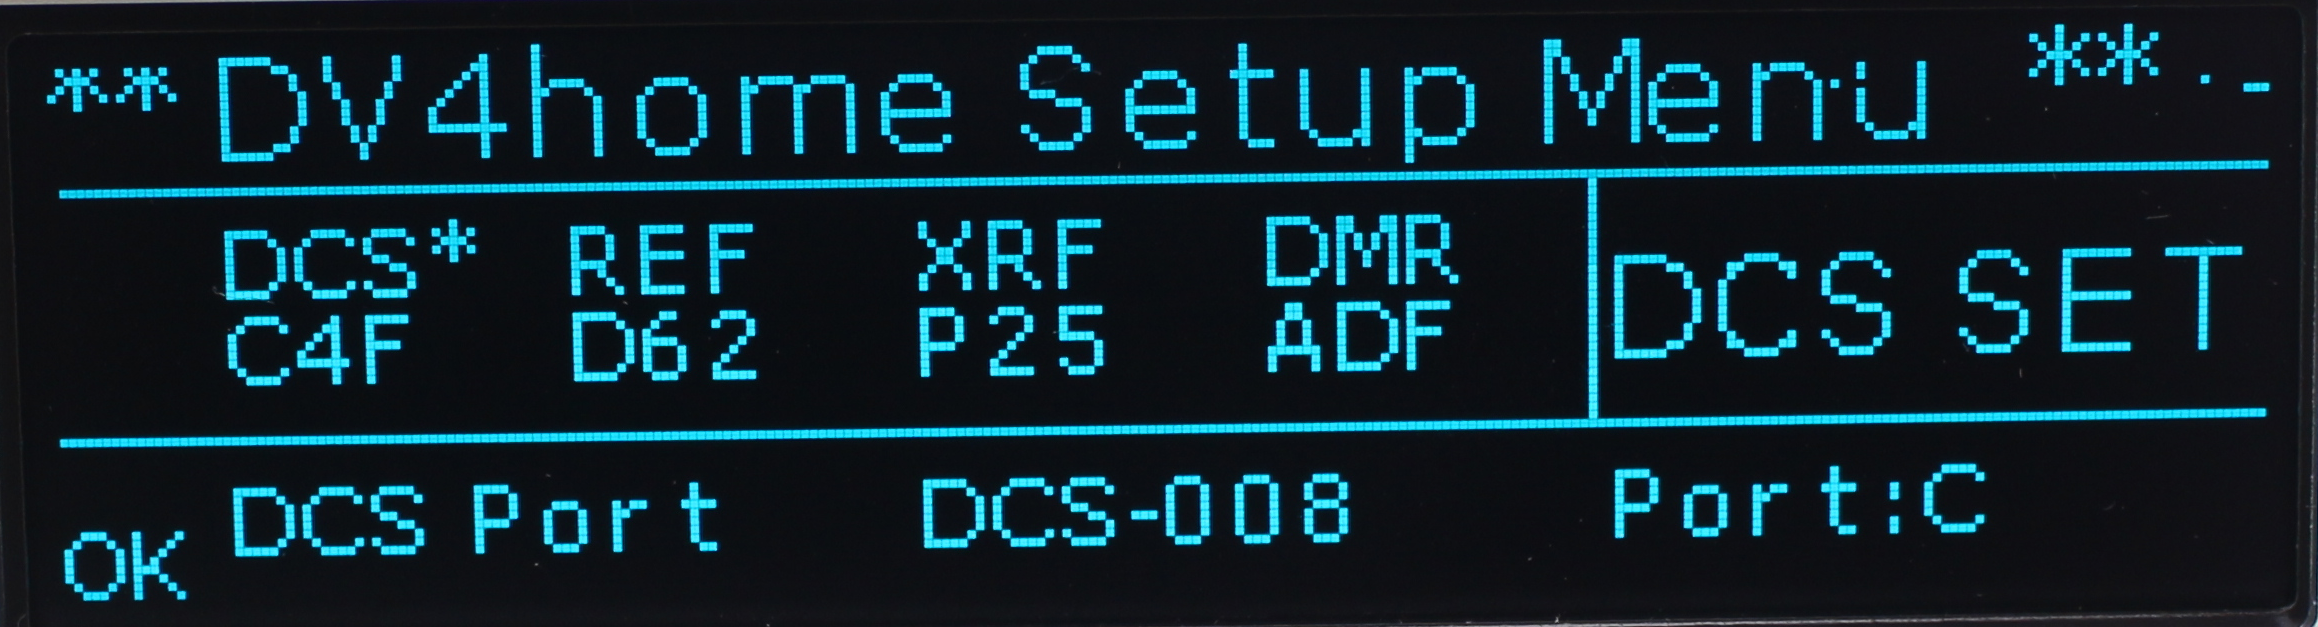
When you press and hold the MENU knob for selecting the reflector this will bring you back to the submenu. Rotate the MENU knob for the next submenu selection, DCS Port and do a momentary press. Select the desire Port by rotating the MENU knob and press and hold the MENU knob to complete the selection.
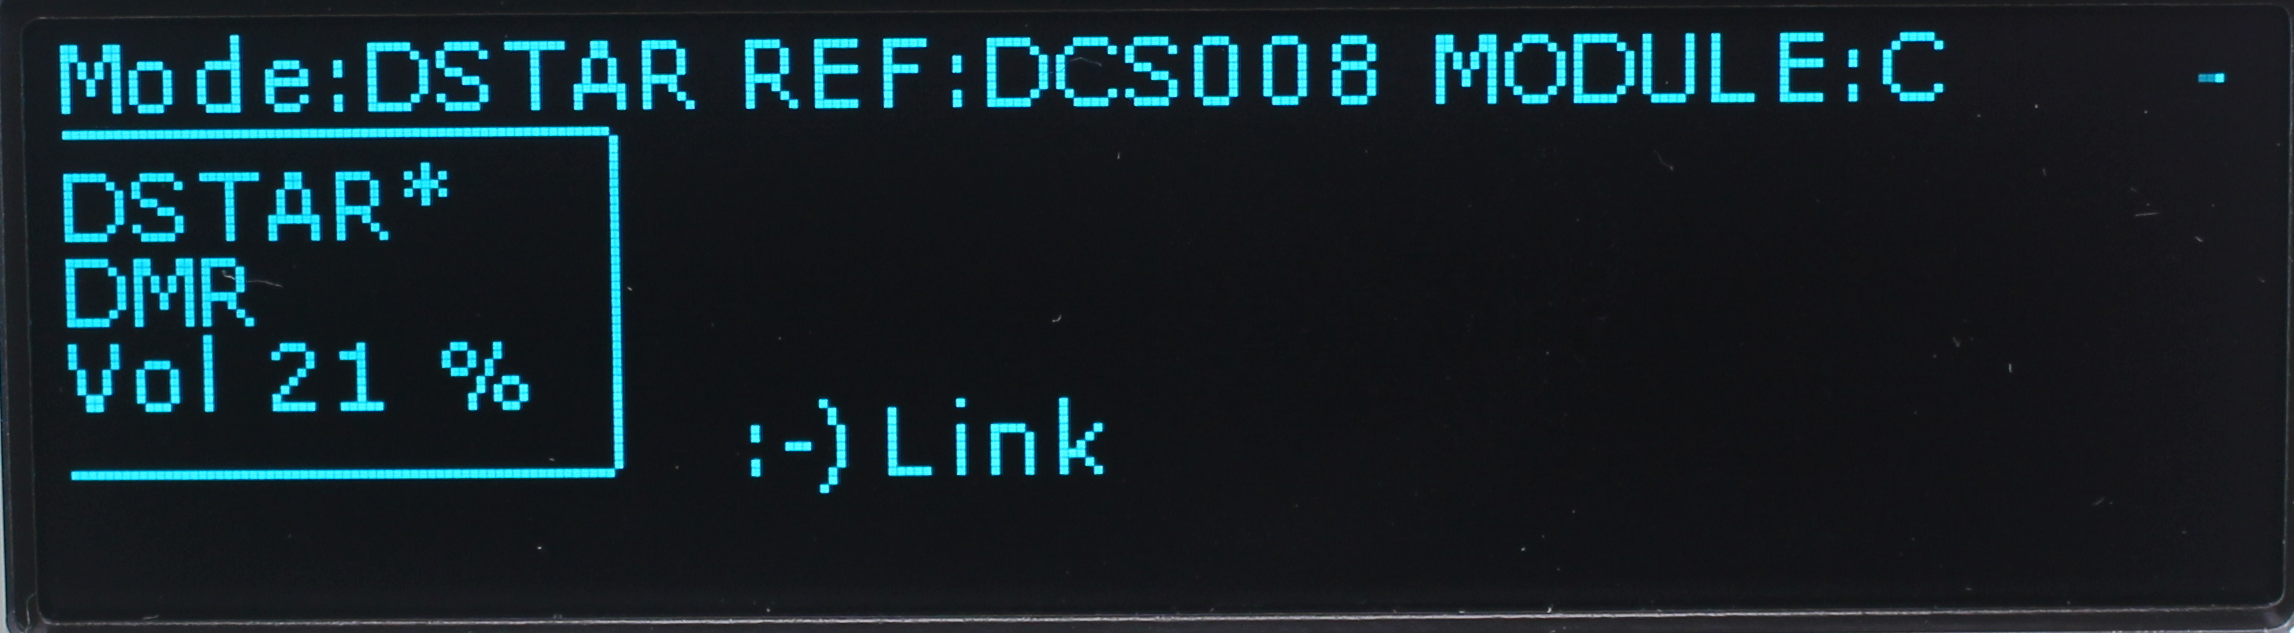
When you do a press and hold on the MENU knob for selecting the port this will bring you back into the submenu. Rotate the MENU knob for the next submenu selection, Link DCS and do a momentary press. This complete the reflector selection and you are now connected.
Please not the setup is the same for all reflectors except for a small difference in DMR, when you select a reflector there is no port. Since there’s a lot of them the port selection is change for the step in number needed to navigate through the reflectors. See the image below.
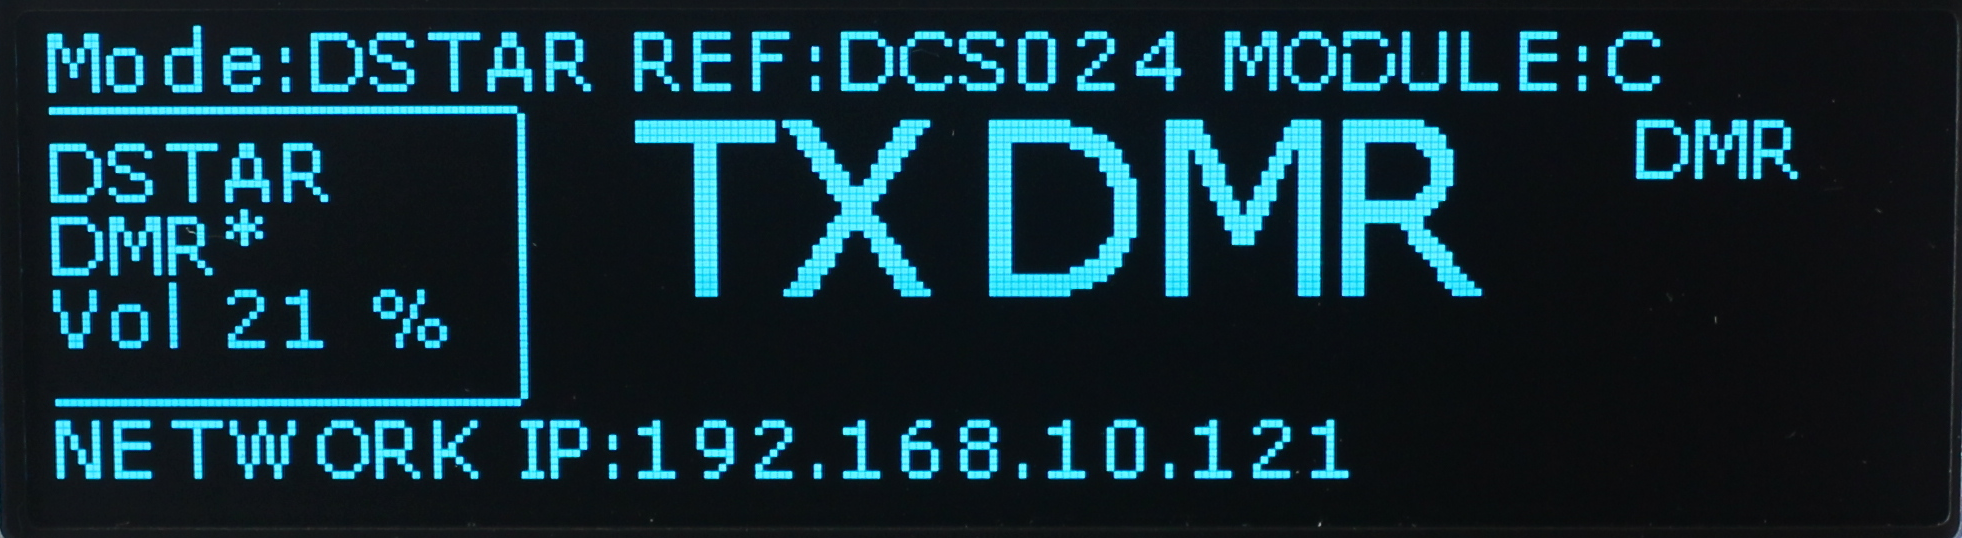
Transmitting with the DV4home
The DV4home operates like a normal transceiver without the RF. It has two separate IP transceivers (2 x AMBE chips) so you need to select which one you will be using; this selection is similar of switching the microphone between two different active VFO’s or band on a RF transceiver. Depending on your choice it will transmit on the active reflector connection for that mode.
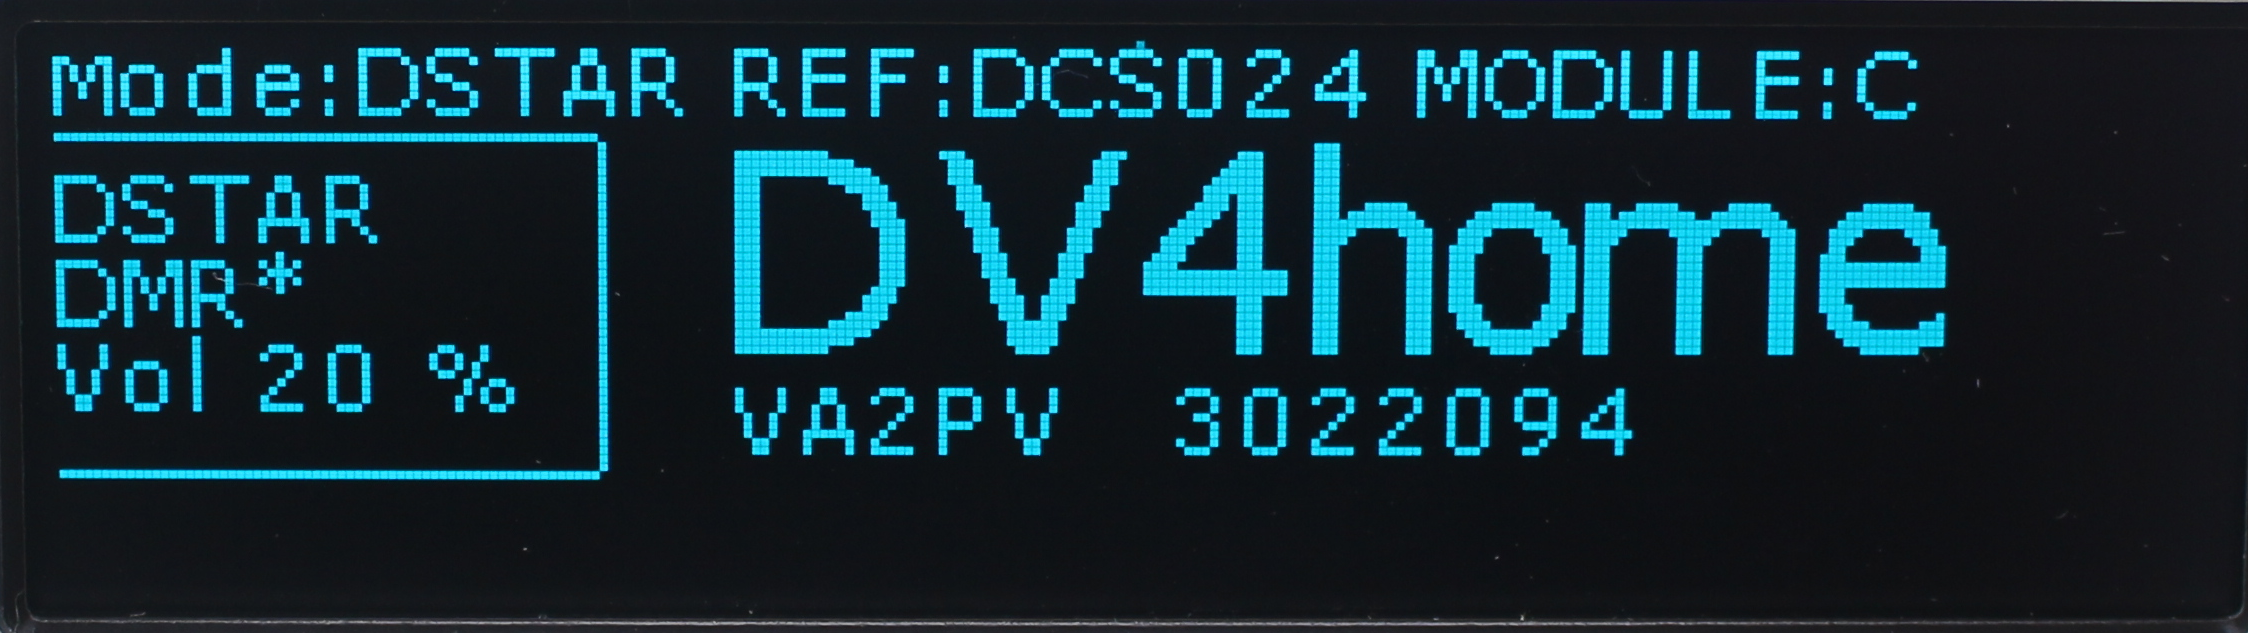
The * after the mode indicate the current active mode, to change mode on main screen, just press and hold the MENU knob then it will switch mode.
For D-Star:
For DMR:
When you transmit in D-Star (PTT)
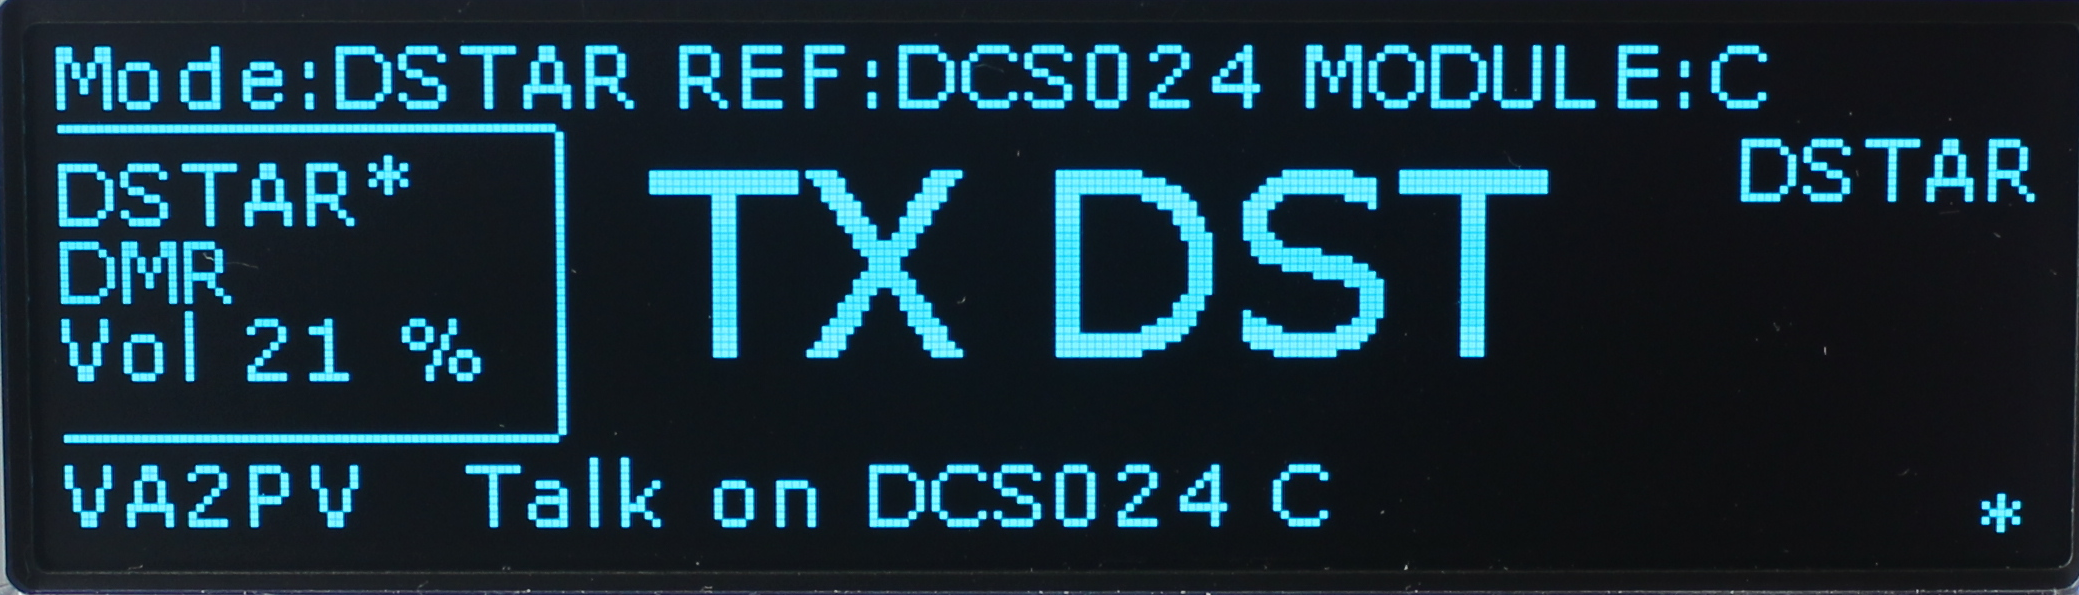
The last bottom line of the DV4home display give you the current status on the reflector, showing the transmitting station, in that case it’s VA2PV.
When you transmit in DMR (PTT)
DV4home full duplex operation
The DV4home as full duplex capabilities. Since it is an IP transceiver, bandwidth is not an issue, but this feature will only work between DV4home and future DV4mobile. When you select any reflector, DV4home owners are able to communicate in full duplex. While doing full duplex your communication will not be heard by the other stations or repeaters that are connected to the reflector. We do not recommend to operate in full duplex intentionally, but this feature can be very useful to detect doubling.
Operating the optional DV4mini
The DV4home can provide a “home” to the DV4mini. You can then add to your device a RF hotspot. Please note that the DV4mini will operate independently of your DV4home. The DV4home just offer an alternative to a PC or a Raspberry Pi hotspot, it provides the power, the software and a stand alone hotspot.
Insert your DV4mini into the identify port on the rear panel. Your DV4mini will fit perfectly. Make sure it’s well seated into the USB port completely at the end of the of the square opening of the case. Please note that there will be no operating information on the front panel (leds) or in the menu of the DV4home.
To operate the DV4mini you will need to do it via the software, either running on a remote PC (Windows or Linux) or a remote Raspberry Pi.
In the software Expert Settings tab, select Nework mode and look for the DV4mini with the same address of your DV4home. Double click on it and you are now controlling this remote DV4mini. See the image below.
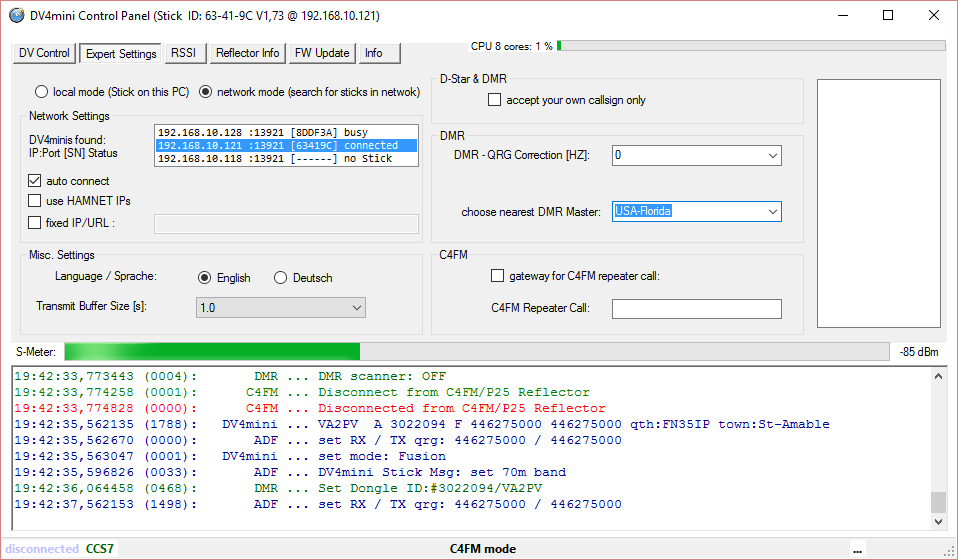
You can now close your software on your computer (or Raspberry Pi), you can even shut the PC down as the DV4mini into the DV4home will operate stand alone with the DV4home. You will only need the remote software to switch mode or reflector. The DV4home will memorize your last use configuration, even if the DV4home reboot it will reconnect to the last known connection and it will work just like a normal hotspot.
Software update
Later this year the software updates will be downloaded to the DV4home automatically. In the meantime, please use the procedure below. A manual will be published end of September 2016.
DV4Home Software Upgrade video demonstration
When a new firmware is available you will get a notice via the DV4home screen. No need to monitor the website.

Please update and use the following procedure:
Open file explorer, click on Network and type in \\192.168….. with the IP address of the DV4home, as it appears on the display. It should look like this, just with the correct IP address:
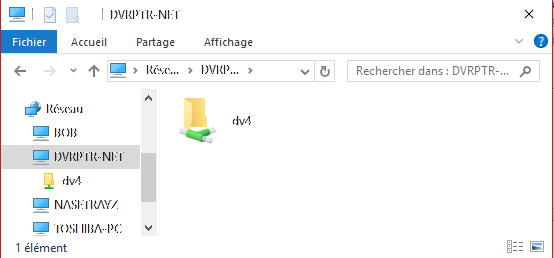
Copy the DV4home update file into the DV4 folder and reboot by disconnecting the power for 5 seconds.
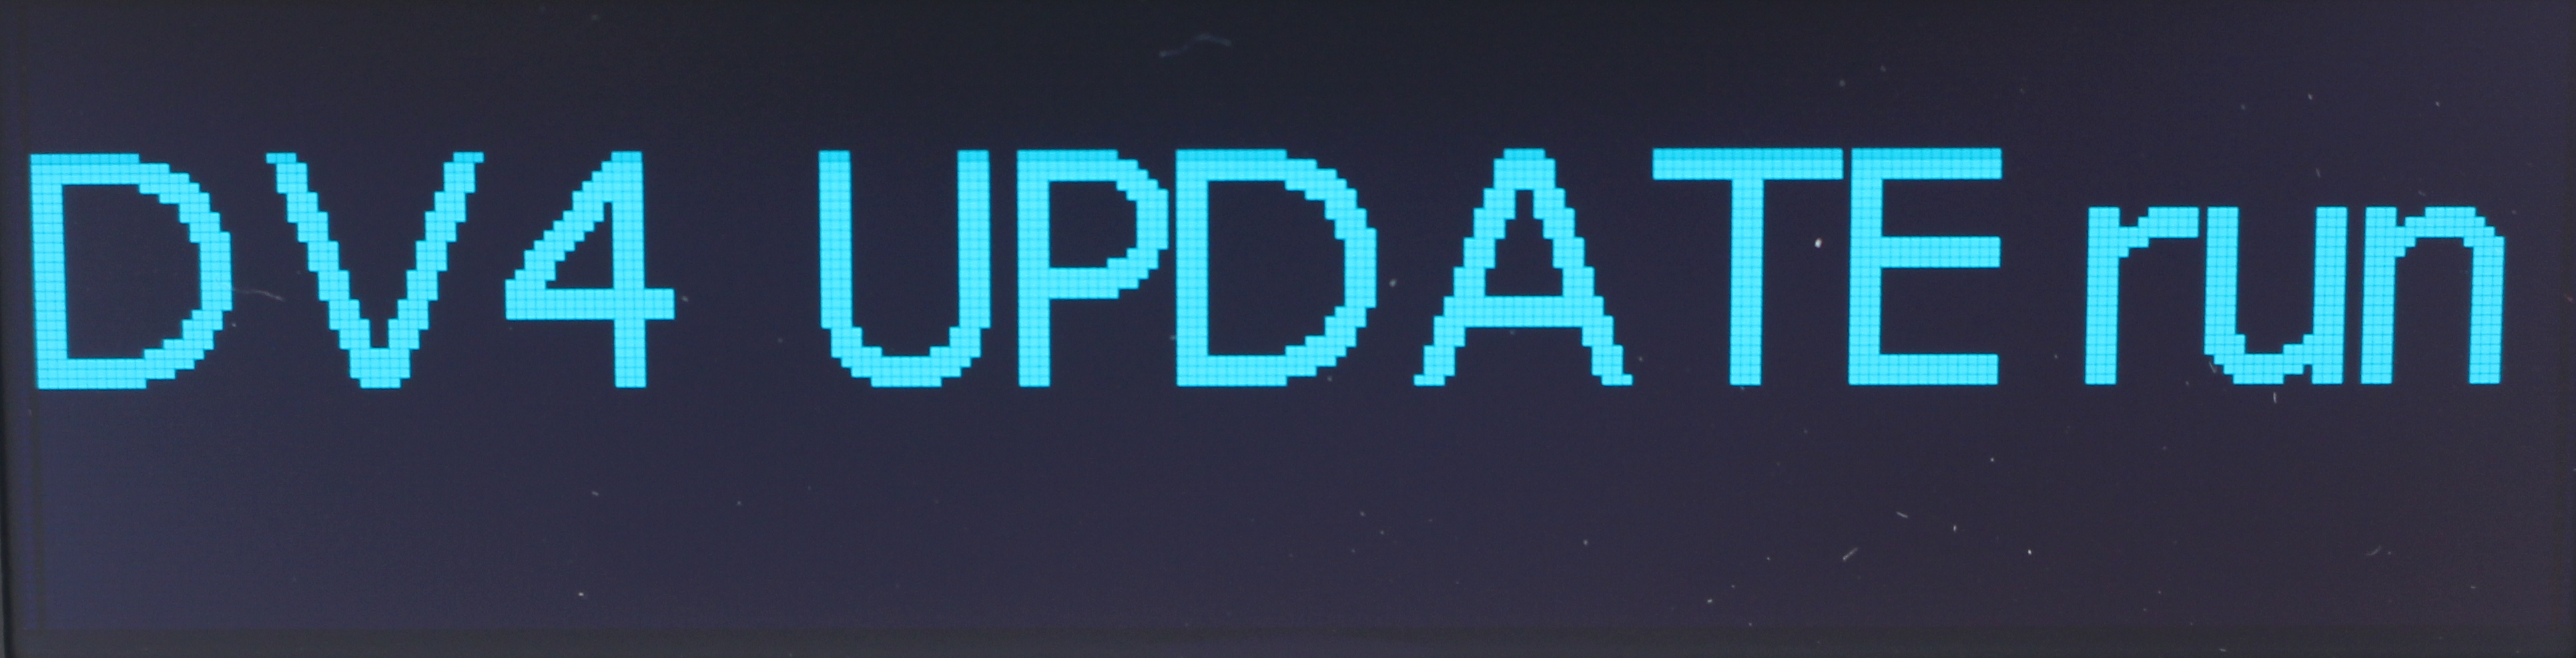
After startup it will come up with a few windows, then it displays DV4 UPDATE!!
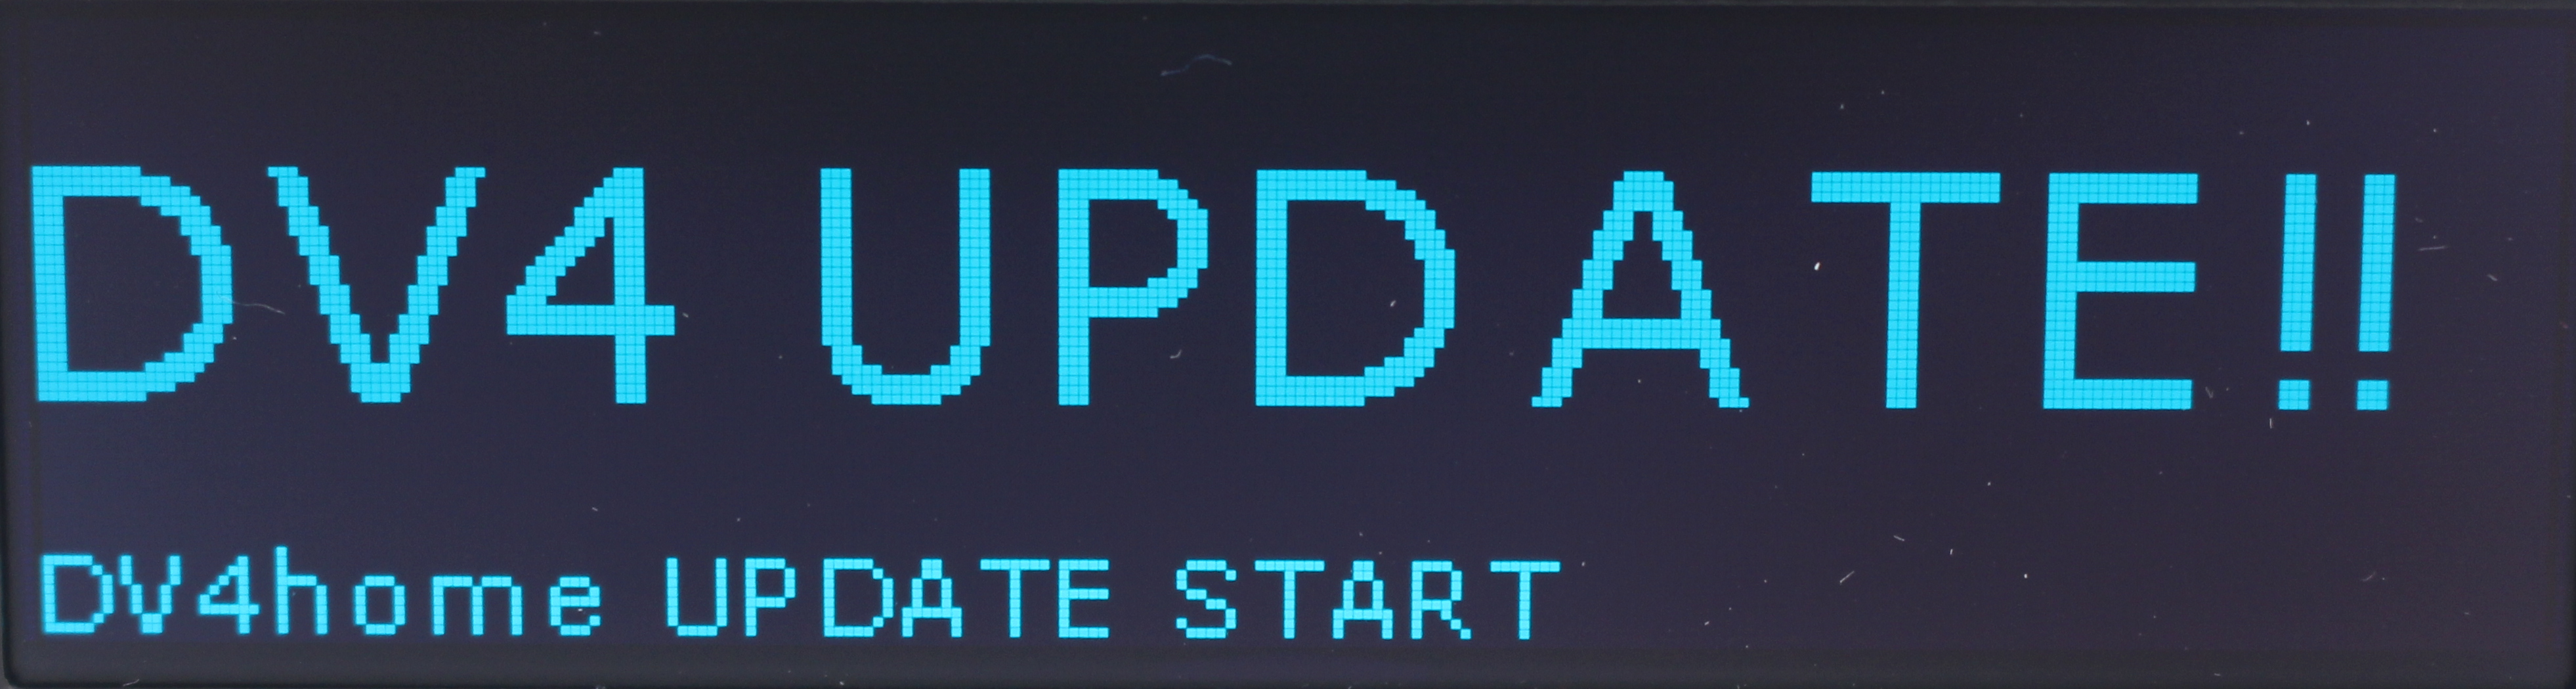
Then it goes black and reboots again. This takes a minute or two, be patient. It will now show DV4 UPDATE run, the TX and RX led will blinks through the process.
Everytime you boot the DV4home it will show you the running firmware version, so after upgrading make sure you have the new version active like below. If it’s not the case unplug the power for 10 seconds and reboot.

You are now done with the firmware upgrade, in the future the device is suppose to udate itself automaticaly.
My unboxing video of the DV4home and DV4mini AMBE
Part 1 – DV4home – Basic setup and menu navigation
This is the part 1 video of the DV4home, showing the basic setup and menu navigation.
Part 2 – DV4home transmit and receive with two actives modes and reflectors
This DV4home demonstration shows the transmit and receive with two actives modes and reflectors. This is the equivalent of having two seperate VFO on a RF transceiver.
Part 3 – DV4home Software Upgrade
This video shows how to upgrade the software for the DV4home. If you find the screen blurry this is caused by my video camcorder auto focus, sorry about this.
Part 4 – DV4home D-Star (on VE2VPS B) and DMR QSO with VA2PX
This video demonstrate a QSO with my friend Martin VA2PX, in DMR and D-Star on the Quebec local reflector VE2VPS B.
Thanks Martin for your help.
DV4home new software – DMR / D-Star crossmode, C4FM, Brandmeister, IPCS2 added
29 janvier 2017
I’m currently testing a new software for the DV4home. The modifications included, the DMR+ complete masters list, the Brandmeister reflectors, the IPSC2 reflectors and the FCS Fusion C4FM reflectors. They also added the D-Star to DMR cross mode using an optional DV4mini. This video shows the added features.
First sight of the new DV4home at the Dayton Hamvention 2016
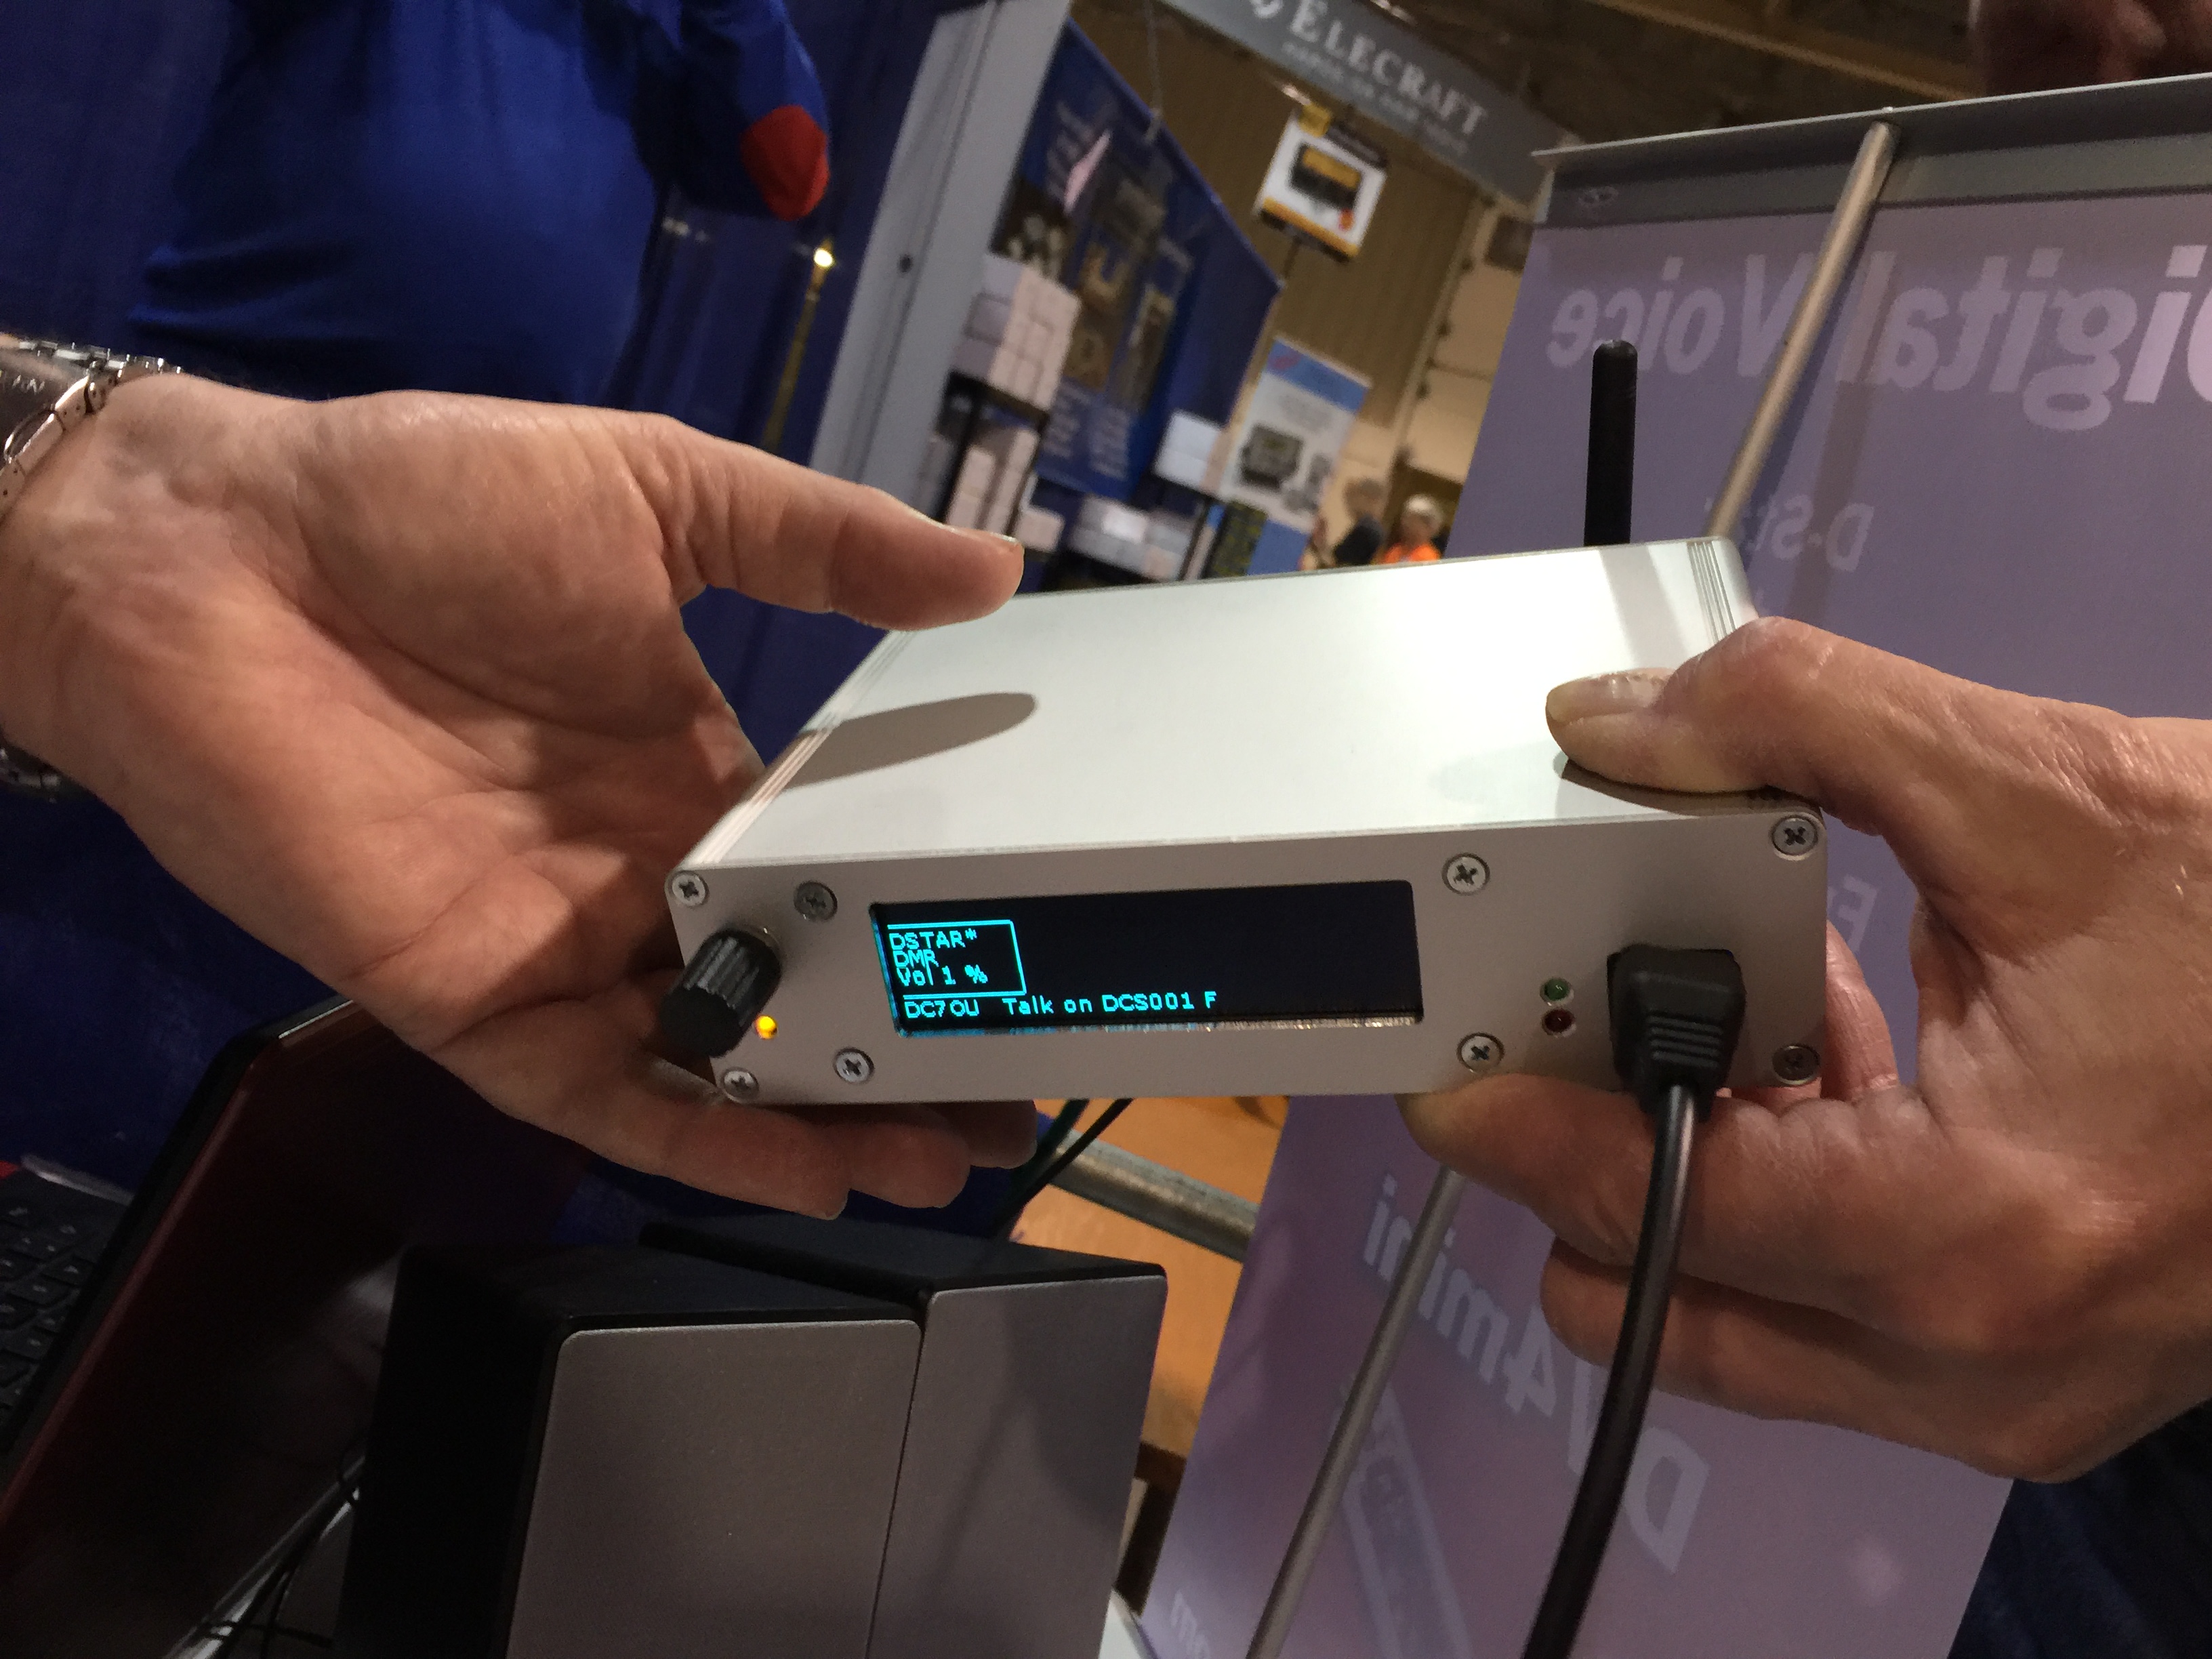
DV4home – Uli AG0X, the difference of the DV4home compact and full…
Hi everyone, here’s more informations about the DV4home from an interview taken this morning with Uli AG0X at the Dayton Hamvention. Uli also explained the difference between the DV4home compact and DV4home full version.