Is your shack a mess? Are you like me? Saving your money for fancy equipment and been neglecting the foundation of a very well organize ham shack? I’ve been thinking about this for a long time.
In 2013 I went to the Dayton Hamvention for the first time and when I saw a table with crimpers, Anderson Powerpole and RIGrunner power bar I stopped and told myself I have to do this, but I went for the radio instead.

* Behind my desk before the reorg
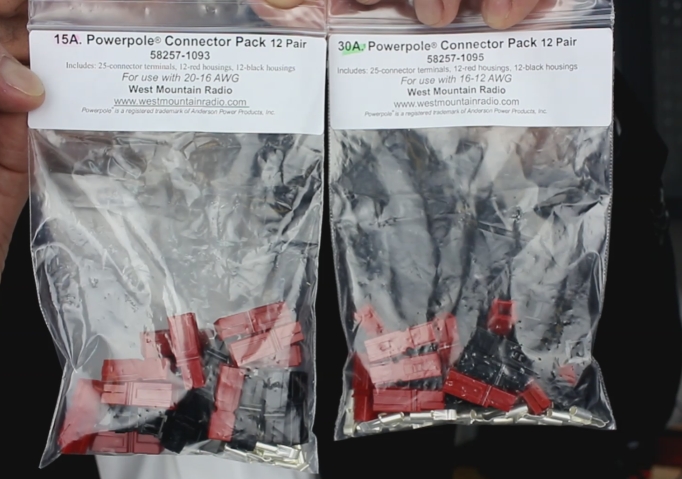
Every time I look behind the desk this project kept coming back in my mind, thinking, something bad is going to happen if it stays like this. I just had to do something about it. So, I decided in my Christmas vacation 2015 to order the necessary accessories to do the job. Here’s what I ordered, the RIGrunner 4012 power bar, one pack of Anderson Powerpole 15 amps and 30 amps (12 pairs each) and the PWRcrimp.

*Rigrunner 4012
*RigBlaster C15-PK12 (15A) and C30-PK12 (30A)

*RigBlaster PWRcrimp
Now I have no excuse, I just need the time to do the job. So while I’m at it, why not reorganize every cable in the shack? So I went to our local electronic store and bought some cable organizers.
Then I planned for the weekend of the 16 and 17 of January 2016. As usual I made a video for our YouTube channel announcing the upcoming project.
Part 1 – Reorganizing the ham shack cabling
I planned my Saturday, step by step;
1. Identify all cables with the P-touch
2. Unplug and removed all expensive equipment from the shack, there’s nothing worse than a dent from a stupid mistake
3. Strip everything: wires, plug, power bar, etc.
4. Clean everywhere for any dust
5. Install the wire organizer, AC power bar and DC power bar (RIGrunner 4012)
6. Convert any DC cable to Anderson Powerpole connectors
7. Reinstall and organize all cables
8. Reinstall the equipment
9. Test everything
I have to tell you, reorganizing all the cables was not an easy task. Here’s a few tips, 1) Add as much organizer as possible so you can segment by type of cable, it will be easier to access without everything’s popping out as you open! 2) If you have items that you move frequently, like your computer, leave the attach cable outside the organizer, because it will be too tight to be move after, unless you give just enough loose.

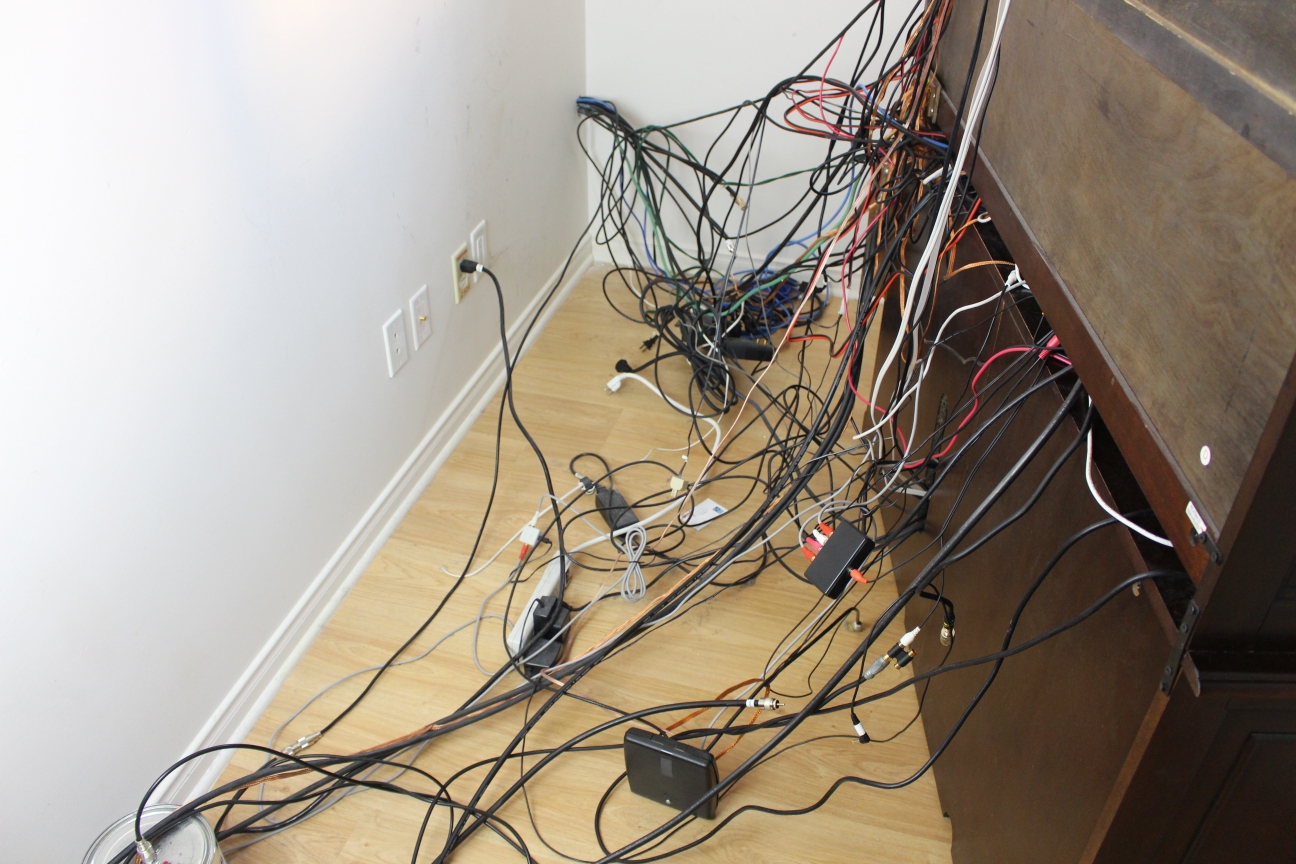
* In this picture there is not enough organizer for the amount of cables
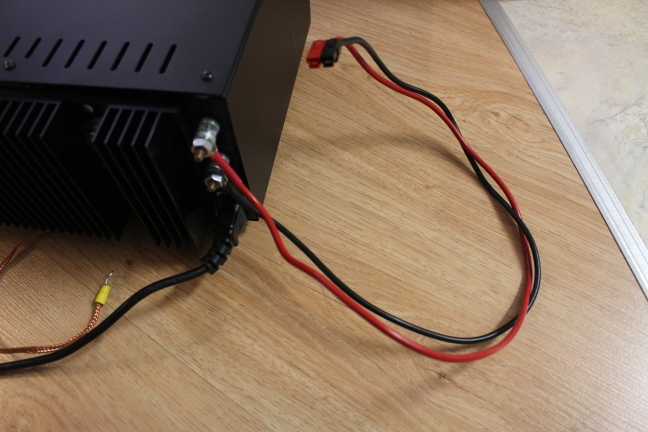
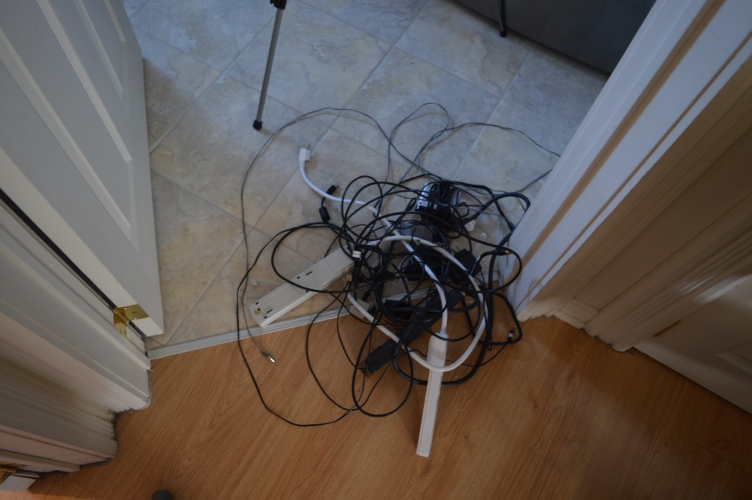
Now comes the fun part, reorganizing the DC distribution. With the crimper and the Anderson Powerpole this was the easiest part of the project. Take a look at my power supply bellow before I installed the RIGrunner 4012. This represent a potential risk of short and it was very painful to add and remove equipment. The other picture is showing the DC cable behind the desk before the reorganization. It was jam!

*Before the reorg
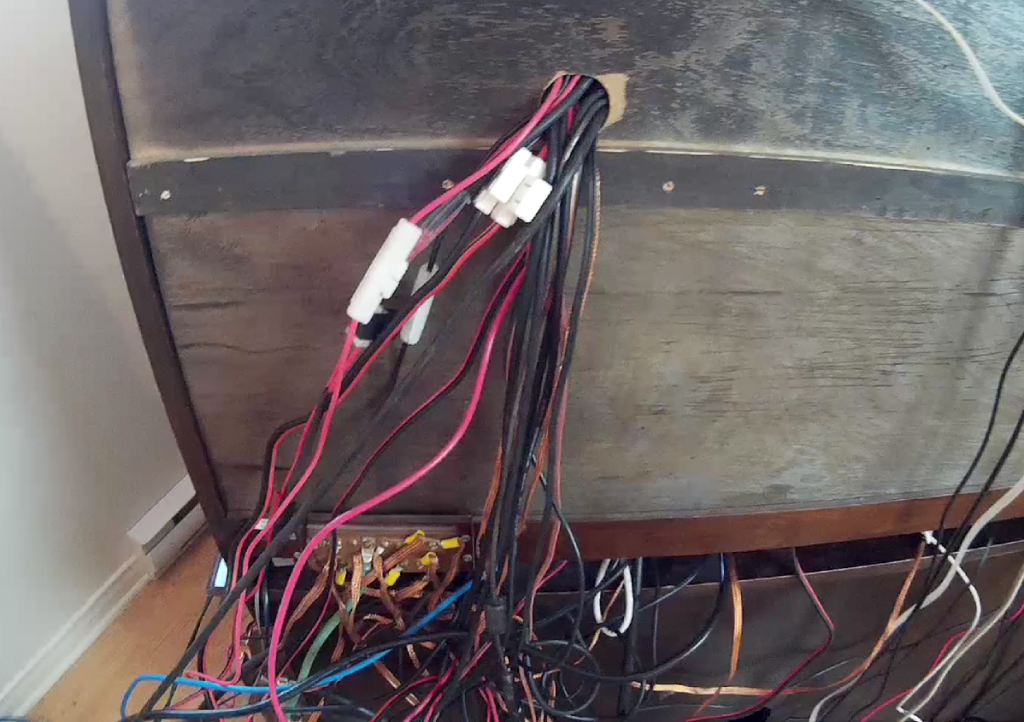
*Before the reorg
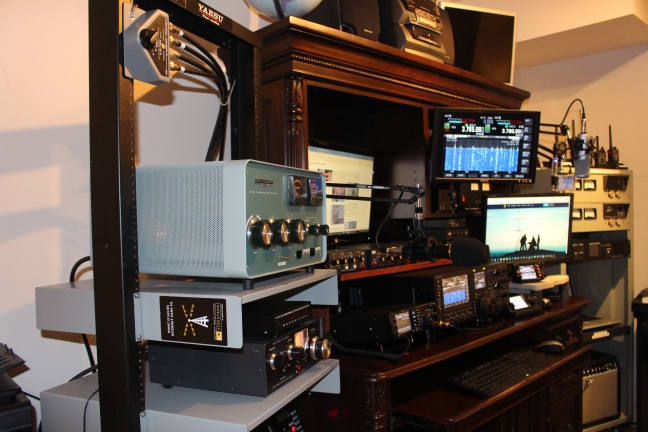
What a difference when done properly, with the right tools! Take a look below, nothing else to say, the pictures speak for itself!
*After the reorg
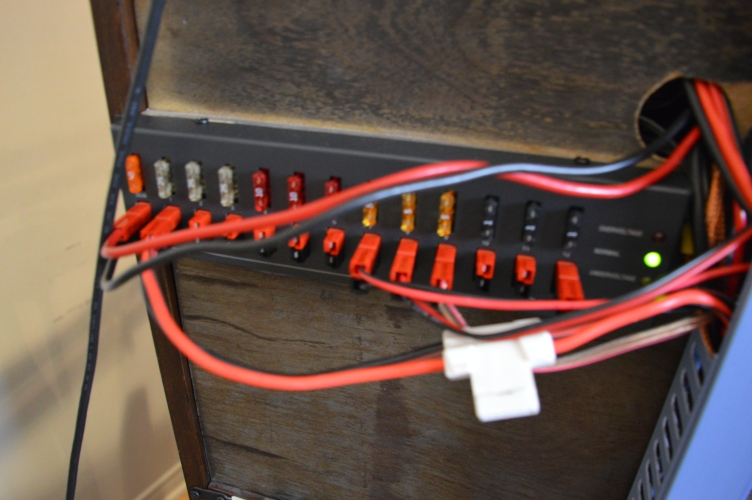
*After the reorg
After this there was leftovers, AC power bar, DC power pack, since I replaced them with cables using Anderson powerpole, now connecting directly to the Rigrunner 4012. One more plus, there’s one birdy that disappear on HF with one of those power pack!
*Leftovers
I am very happy with the result and feel a lot safer with this installation, it’s worth the investment for the peace of mind. It’s now very easy to maintain a proper distribution with easy access to DC power. In the future adding and removing equipment will be a piece of cake.
Watch the Part 2 video of reorganizing the ham shack cabling (English version), you will see the installation process.
Part 2 – Reorganizing the ham shack cabling
Below you will find me actually doing the job with a time elapse.
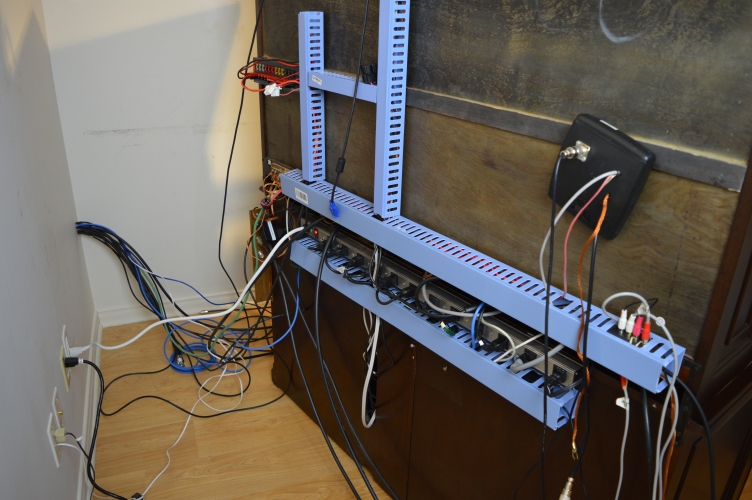
* Behind my desk after the reorg
For more information about the West Mountain Radio products, click here.
73 de Pascal VA2PV